Adding an Agent
Agent Setup
To communicate with the controller, agents send data across a Gateway Network connection. If your Gateway Network setup requires that connections be manually approved in advance on the controller Gateway, you will need to set up the Gateway Network connection before starting the EAM Setup Wizard. You will be able to select the existing Gateway Network connection within the wizard. Navigate to Configure -> Enterprise Administration -> Setup to begin the EAM Setup Wizard.
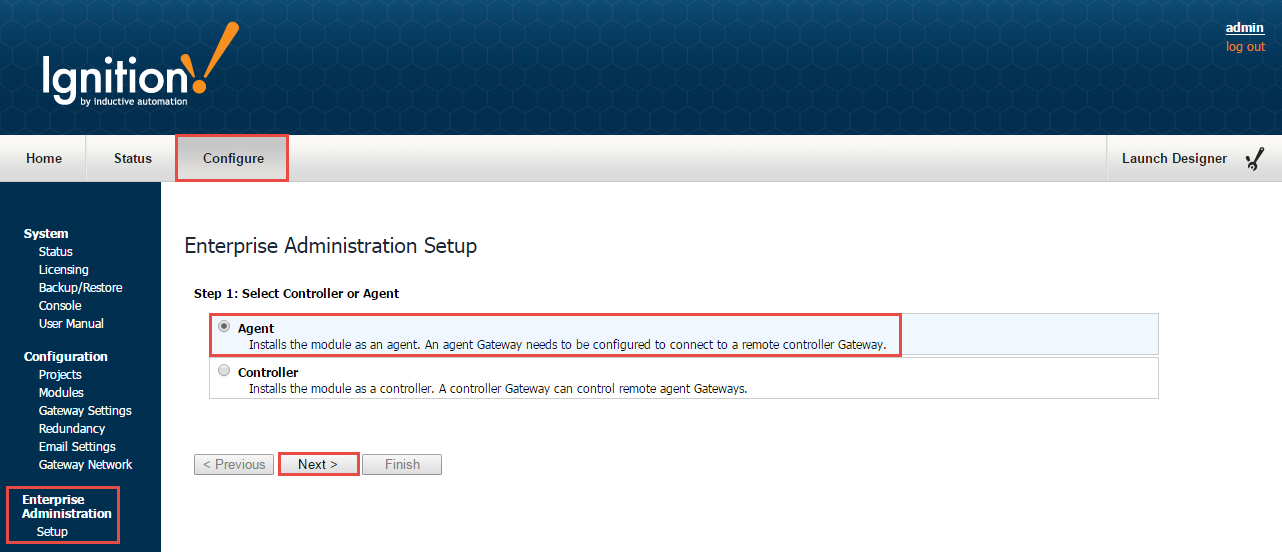
Step 1: Select Controller or Agent
Since you are installing an agent, select “Agent” on this screen. Click the Next button.
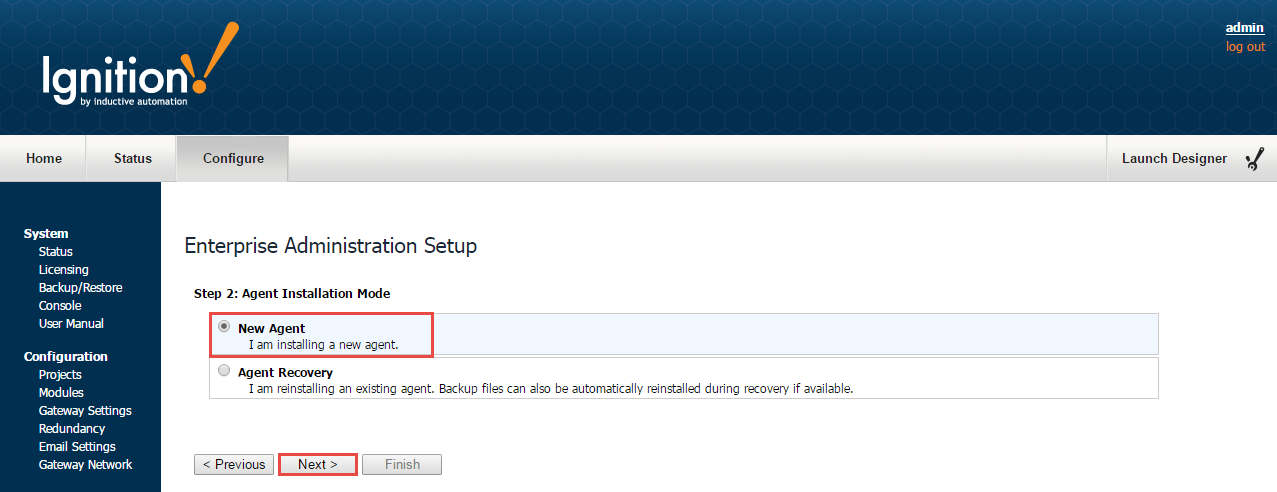
Step 2: Agent Installation Mode
Select New Agent or Agent Recovery. Select “New Agent” if you are setting up a machine that is unknown to the controller. Select “Agent Recovery” if you are reinstalling an existing agent (possibly on a different machine), and the machine has been known to the controller in the past. This option also gives an opportunity to perform a system recovery (restore Gateway backup, reinstall missing modules and license) if possible. After you have made your selection, click the Next button.
Step 3: Gateway Network Setup
As mentioned previously, a Gateway Network connection is required to communicate with a controller. On this page, you can either enter the settings to create a new Gateway Network connection, or select an existing connection from the dropdown. Use the Test Connection button to test the settings you have selected. Note that you cannot create a new SSL connection on this page. When using SSL, you must create the Gateway Network connection before entering the EAM Setup Wizard.
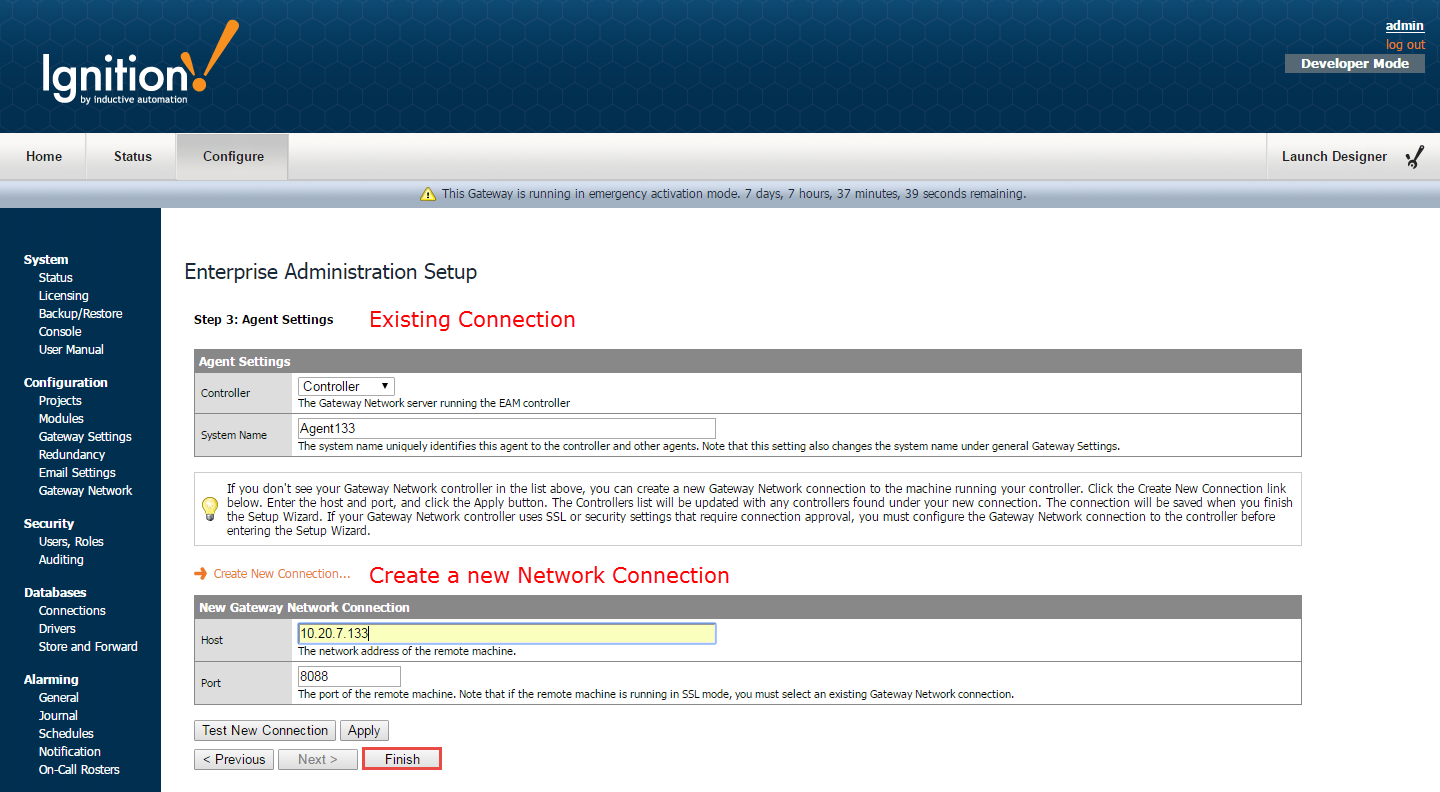
Step 4: Agent Settings
Gateway Network Server- select your controller machine from this dropdown list.
System Name- when running in New Agent mode, you have the opportunity here to set the Gateway System Name. This name is used to reference the agent on the controller Gateway pages. Note that changing the name here will also change the system name under general Gateway Settings. When running in Agent Recovery mode, you must choose the Gateway System Name from the System Name dropdown. This dropdown holds all the agents for which the controller has lost contact. If you are running an Agent Recovery, then the agent you are trying to recover should be on this list.
Perform System Recovery- this checkbox is only shown when running in Agent Recovery mode. After you click the Finish button, the Gateway will attempt to download the most recent gateway backup, previously installed modules, and the license file.
After you have made your selections, click the Finish button.
Agent Post Setup
The EAM module will now attempt to register the local Gateway as an EAM agent on the controller, and download files if performing a system recovery.
If you are running in New Agent mode, you will see the agent status check on the screen. When the agent status check is complete, you will need to navigate to the controller Gateway and approve the agent on the Gateway Agents page. Click the Retry button to recheck agent status on the controller if the first status check failed.
If you are running in Agent Recovery mode, and you have selected the System Recovery option, you will see the download status of the license file, installed modules, and the most recently collected Gateway backup file. Depending on the contents of your archive, some files may not be available. Click the Apply Files button to apply downloaded files. Note that this operation will require a Gateway restart if a Gateway backup file needs to be applied. Click the Ignore Files button to close this page and not apply downloaded files. Note that the agent settings have already been saved, so it is safe to not apply downloaded files if you choose. Click the Retry button to attempt to download the recovery files again.
[IMPORTANT] After you have set up your agents, it is very strongly recommended that you set up a regularly scheduled Collect Backup task for your agents. System recovery thru the EAM Setup Wizard will not work if there are no archived backup files!
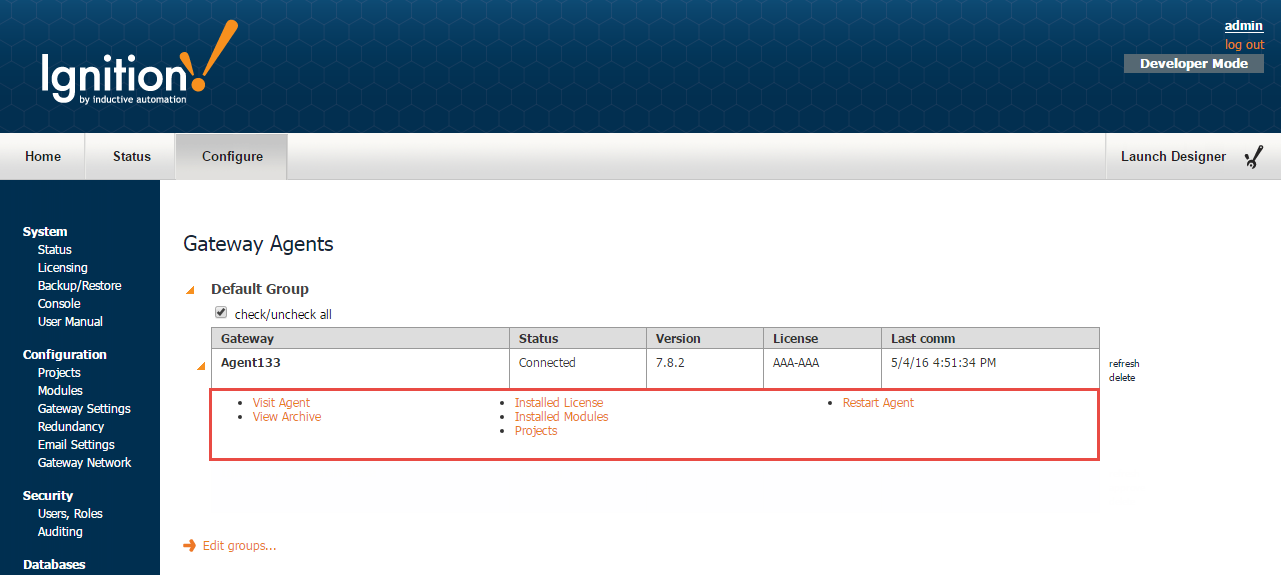
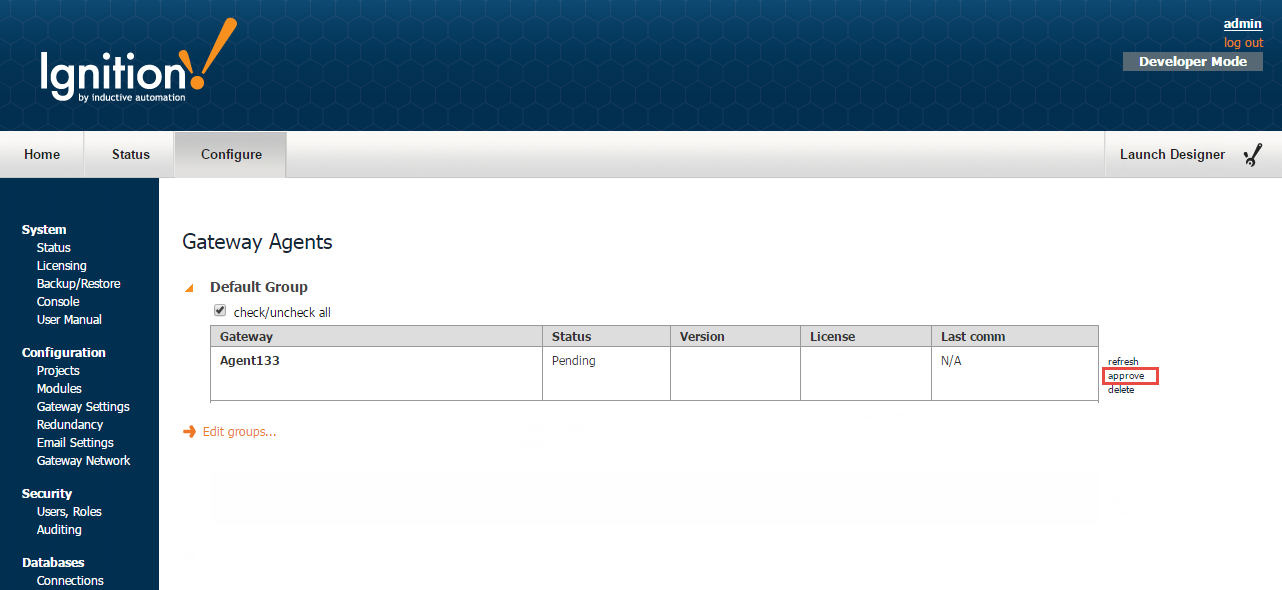
Agent Approval
When an unknown agent first contacts the controller, it is saved in pending status. No interaction with the controller is allowed until you approve the agent. Agent version and license information fields will remain empty until the agent is approved. To approve the agent, click on the “approve” link on the right side. After a few moments, the agent’s status should change to “Connected”. To remove an agent, click the “delete” link on the right side. If the agent machine is still active, the agent will reappear on the list in pending status, but will no longer be able to interact with the controller. To remove the agent permanently, you must navigate to the agent Gateway and uninstall the agent via the Agent Settings page.
Agent Groups
Agents can be grouped into agent groups that you create. This allows you to organize agent lists by location or agent function. Agent groups can also be selected in gateway tasks. For example, you can create an agent group for a location that collects backups every night at 3AM. Any new agent that is added to the group will automatically be included when the gateway tasks executes. To create an agent group, click the “Edit Groups” link at the bottom of the page. You will now be on the Groups page, where you can add groups, edit a group name, and delete a group. If you delete a group that contains agents, the agent will be automatically reassigned to the default group.
To assign an agent to a group, check the checkbox on the left side next to the agent name. Then locate the agent groups dropdown on the right side next to the “Move selected Agents to” link. Select the new group from the dropdown. Then click the “Move selected Agents to” link to move the agents.
Agent Actions
Each agent row is expandable with a

Restart: creates a gateway task that immediately restarts the agent Gateway. After clicking the link, you will be asked to confirm that you really want to restart the agent.
License Detail: opens a page which compares the agent’s current license to the license key on file at Inductive Automation. This page is handy when you have purchased new software for a license, and you need to verify that your agent’s license key is up to date. You can update the license for this agent by clicking the “Update Agent License” link at the bottom of the screen. This will schedule a gateway task to immediately update the license on the agent.
View Archive: opens a page that allows you to view all gateway backups and modules that have been archived for this agent. You can schedule a gateway task to restore a specified gateway backup from this page by clicking the “Restore Backup” link on the right side.
Installed Modules: opens a page that displays all modules that are currently installed in the agent Gateway. The module version and the current state of each module is also displayed
Projects Detail: opens a page that displays all projects that currently exist on the agent. The Project Source field is populated by the controller name if the project was deployed to the agent by the controller via a gateway task.