Navigation - 2 Tier
2 Tier Navigation is similar to the Tab Strip navigation strategy. It's good for small and regular size project structures where windows are grouped, and lets you organize your main windows into different sections making navigation easy for users. It uses two levels of tabs to navigate around various areas of your project. Once you select a first tier tab, a different set of tabs appear in the second level to switch between different windows. The 2 Tier navigation Project Template has a docked north window that contains tabs that are always open and a main window which fills the rest of the space.
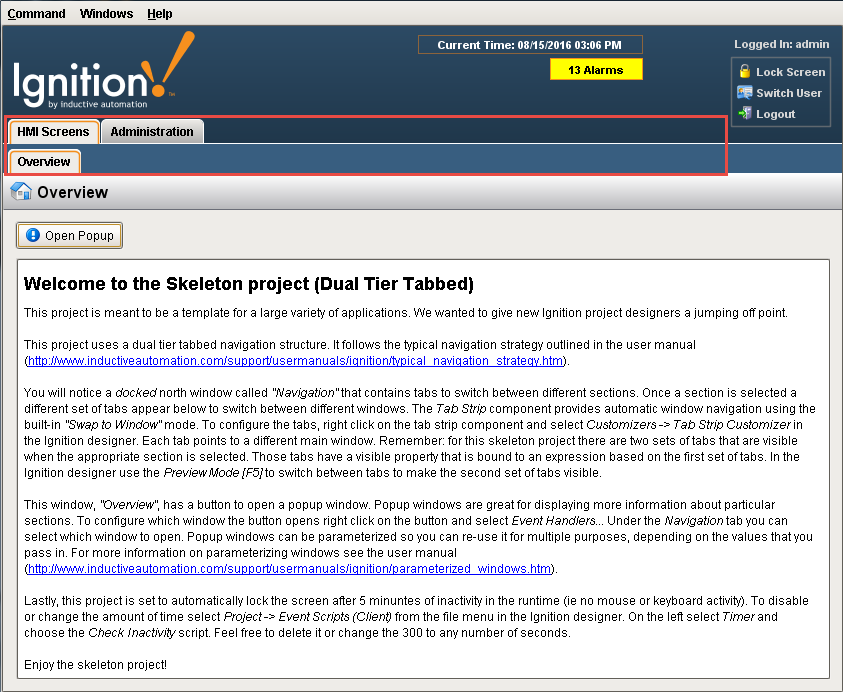
When you first open the 2 Tier navigation project you'll notice a couple of things immediately - the dual tier tabbed navigation structure that allows you to switch between different windows, and the skeleton project to help you get started designing the navigation structure in your project.
To configure the 2 Tier in the Designer
A docked north window called Navigation contains tabs that allow you to switch between different sections in your project.
-
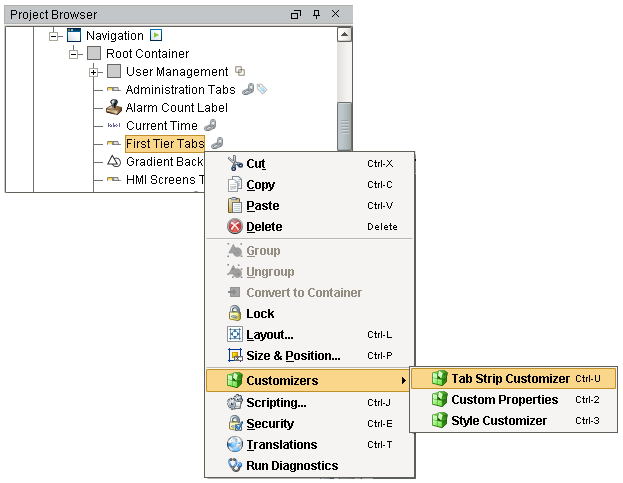
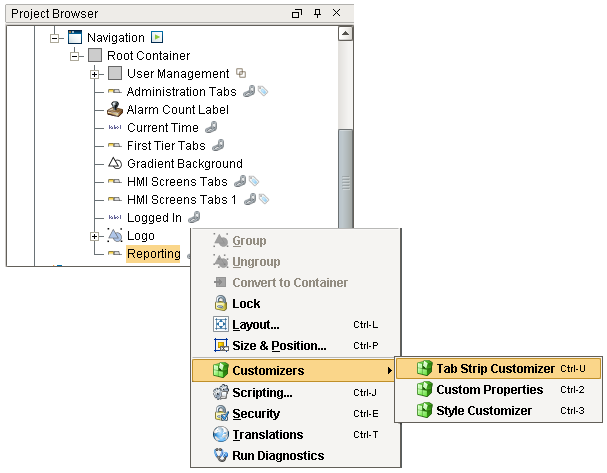
To create first level tabs, go to the Project Browser, right click on the Tab Strip component (i.e., First Tier Tabs) and select the Customizers > Tab Strip Customizer.
-
You'll notice that the Navigation Mode is disabled for the First Tier Tabs, and there are HMI Screens and Administration tabs that already exist as part of the skeleton project as shown in the screenshot below.
-
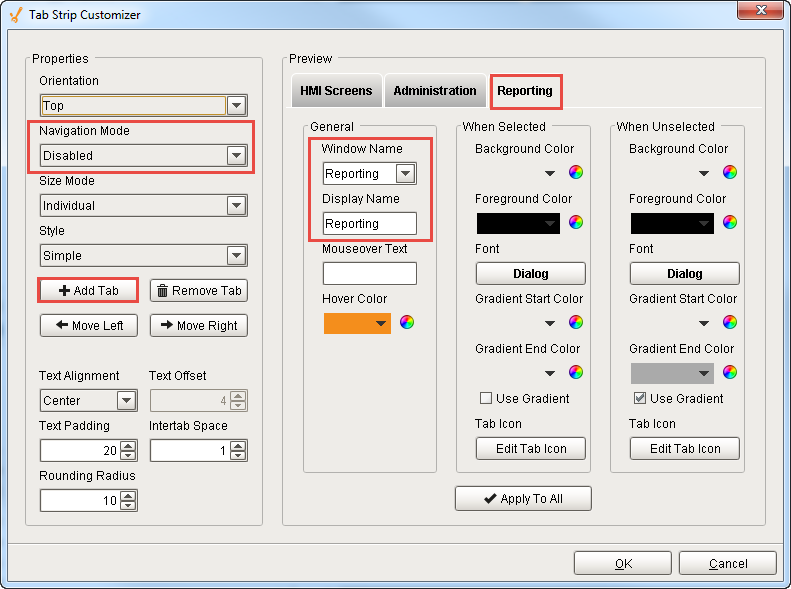
Click Add Tab to create a new First Tier Tab. Enter a keyword for your Tab name. (i.e., Reporting) in the Window Name and Display Name fields. The keyword can be the same name for both fields. (Note: a folder path is not required for First Tier Tabs).
-
Press OK.
-
-
To create a second level component, go to the Project Browser, select an existing second level tab (i.e., HMI Screens Tab), and duplicate it by pressing CTRL D.
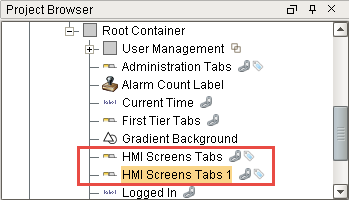
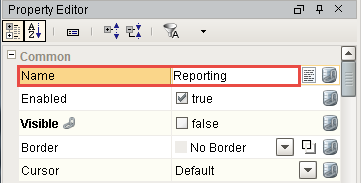
In the Property Editor, change the duplicate Name (i.e., HMI Screens Tab 1) to reflect the second tier tab name (i.e. Reporting).
-
To create your second level tabs, go to the Project Browser, right click on the Tab Strip component for Reporting, and select the Tab Strip Customizer.
-
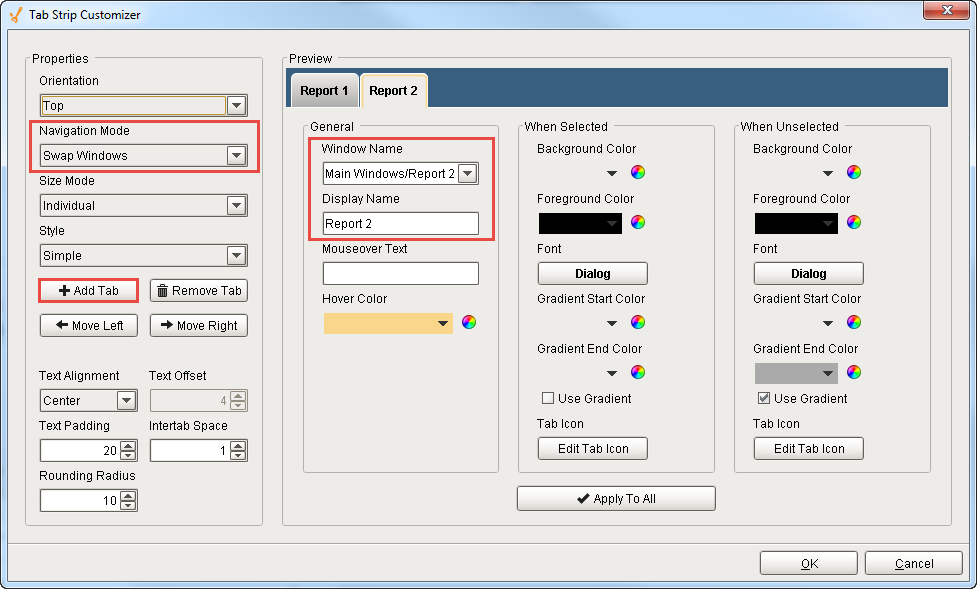
Notice that the Tab Strip Component provides automatic window navigation using the built-in 'Swap Windows' mode for second level tabs.
Each second level tab that you create will point to a different main window.Main Windows already created
This step assumes you already have your second tier main windows created in your Project Browser.
-
Click Add Tab and select the Window Name from the dropdown list (i.e., Main Windows/Report 2).
-
Enter the Display Name / Tab Name (i.e., Report 2).
-
Repeat this step for as many tabs that you want to create.
-
Press OK.
-
-
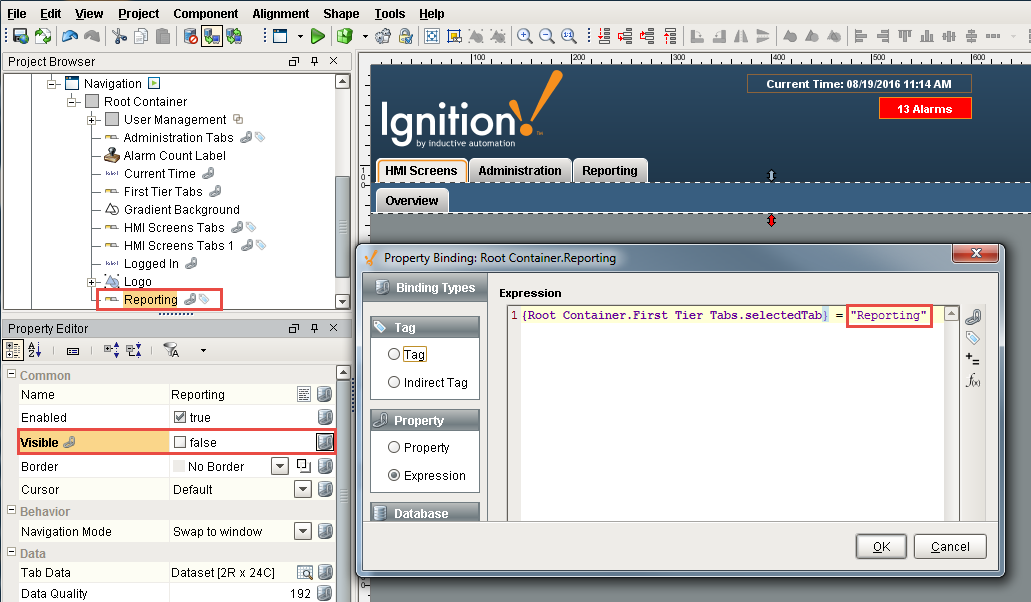
Second Level Tabs have a Visible property that is bound to an expression based on the First Level Tabs. This expression needs to be updated for the new second level tabs.
-
Select the Tab Strip component for the second tier (i.e., Reporting).
-
Go to the Property Editor, select the Visible binding icon, and enter the First Level Tab keyword that you entered in step 2, (i.e., Reporting).
-
Press OK.
-
-
The 2 Tier skeleton project includes a default expression for navigating between windows in a project. If you're adding and/or modifying existing tabs, then you need to update the expression binding to fit your windows.
-
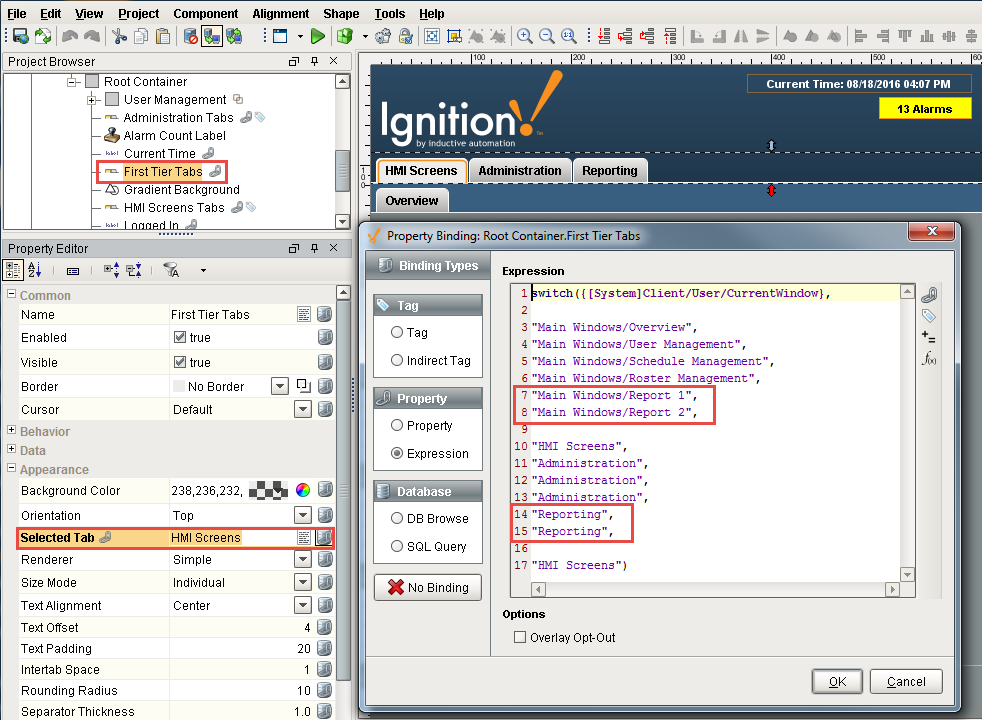
Select the First Tier Tab component, and click on the binding icon for the Selected Tab property,
-
Add the window path (i.e., Main Windows/Report 1 and Main Windows/Report 2) for the new tabs, and the second tier Tab Name (i.e., Reporting) for each window as show in the following example.
-
-
In the Designer, use the Preview Mode to switch between tabs to make sure the Second Level Tabs are visible.
-
Save and Publish your project.
-
Open your project in the Client, click on the various tabs to see your first and second tier tabs switch between the different windows.
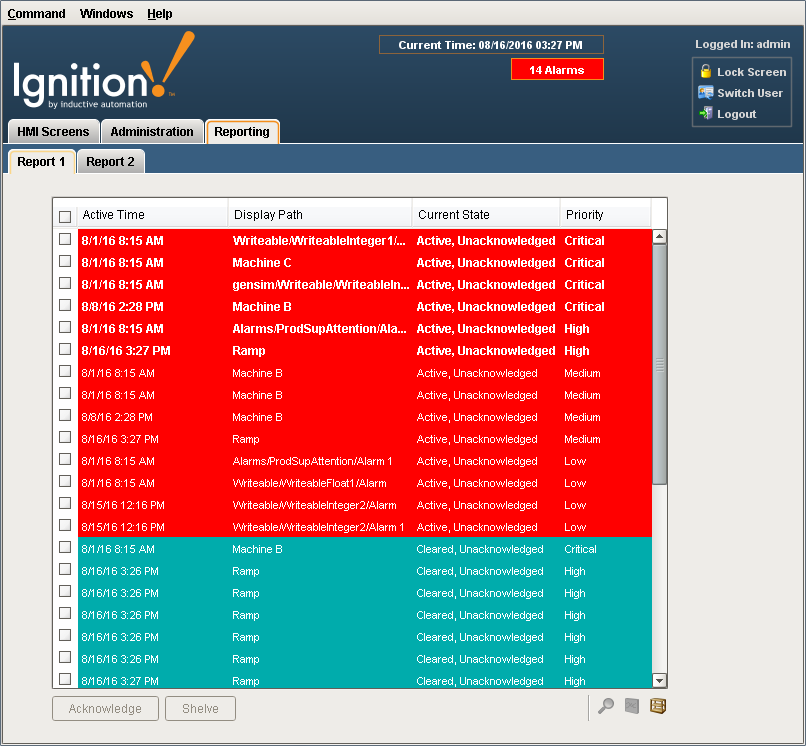
2nd Tier Tab - Report 1
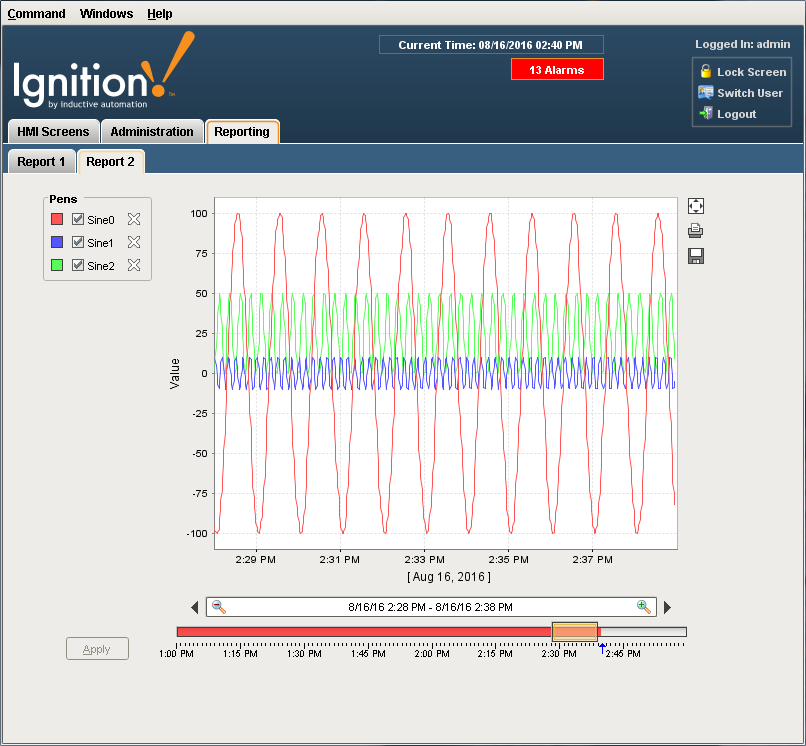
2nd Tier Tab - Report 2
Similar Topics ...