Alarm Status - Shelving
Another important feature of the Alarm Status Table is the capability to shelve alarms. Shelving alarms allows you to temporarily silence an alarm for a fixed period of time. This feature is extremely handy when an alarm is already active and you want to temporarily surpress the alarm while you're working on the issue. The Alarm Status Table component will not send any notifications while the alarm is shelved, and will be temporarily dropped from the Alarm Status list so operators don't get confused and think it's active. When the shelved time period is up and if the alarm is still active, it will return into the Alarm Status list.
Active alarms must be present in the system to shelve an alarm
Active alarms must be present in the Alarm Status Table before you can shelve an alarm.
How to shelve an alarm
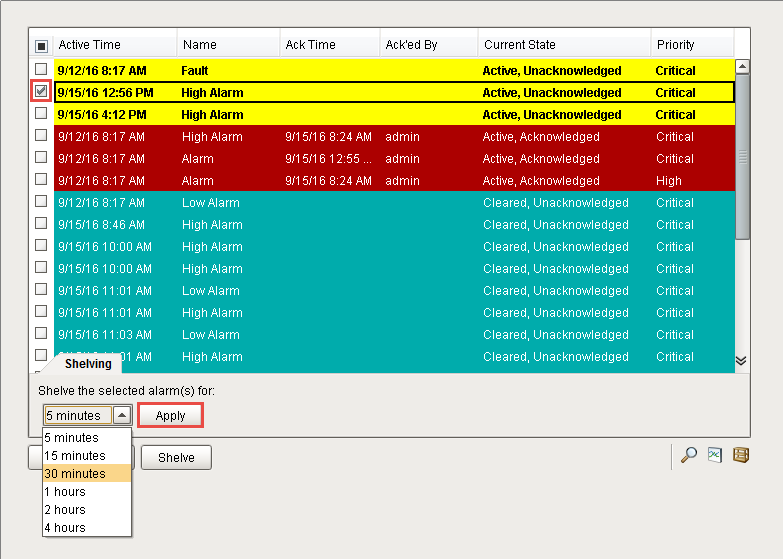
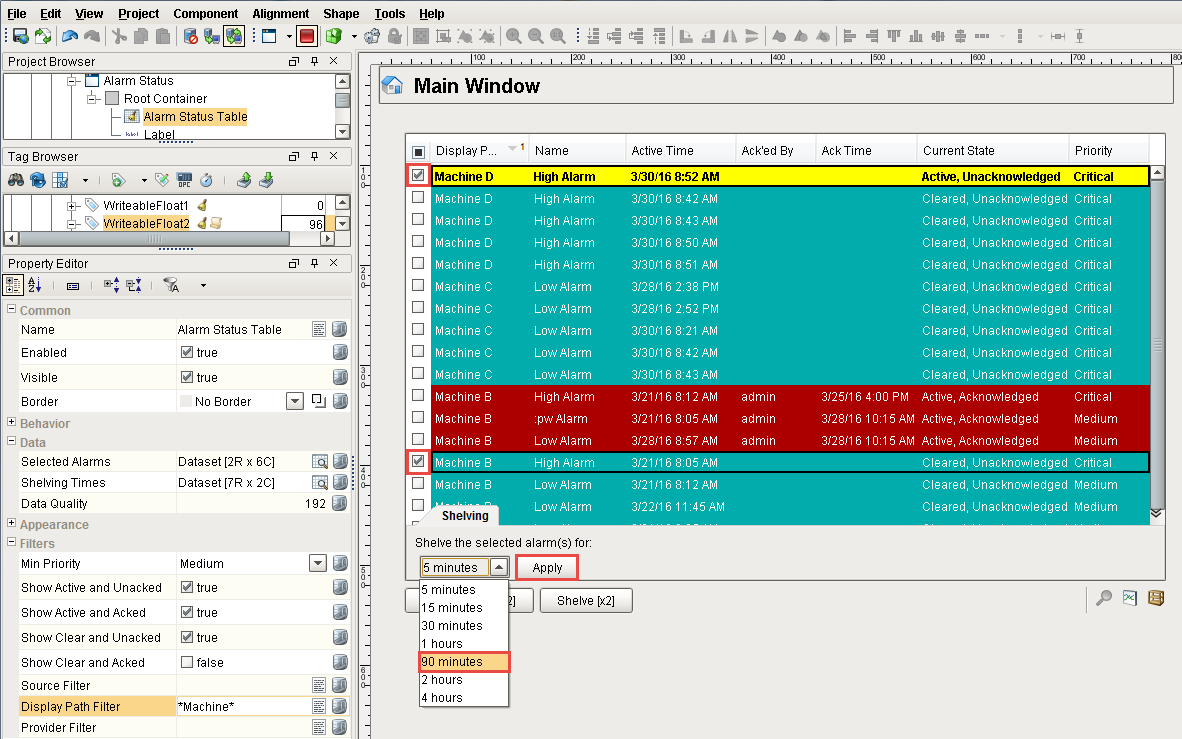
To shelve an alarm, select one alarm or multiple alarms, then press the Shelve button. The Shelving tab will automatically open so you can set a duration to silence an alarm You can set a duration from 5 minutes to 4 hours in which to shelve selected alarm(s). Select an alarm, choose 30 minutes, and press Apply. You can test out your shelved alarm in the Designer in Preview Mode.
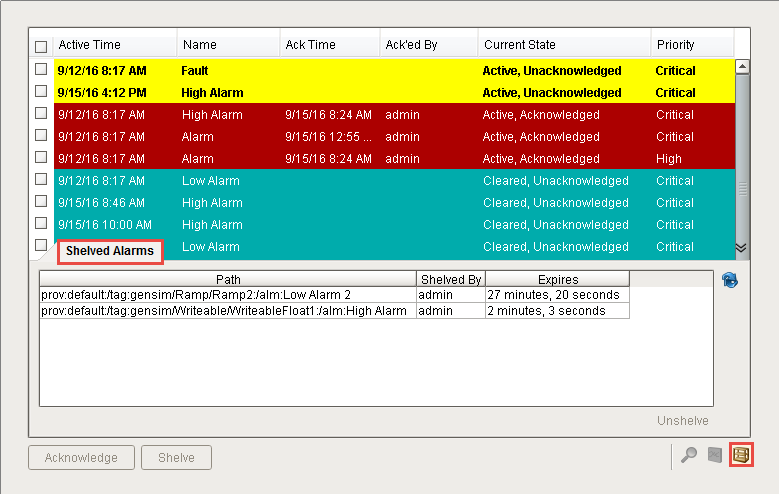
To view all the alarms that are currently shelved, go to the bottom right of the Alarm Status Table and click on the Shelved Alarms icon ![]() . A Shelved Alarm tab will open and show all of the shelved alarms, as well as when the shelved time period expires. To close the Shelved Alarm tab, click either the Shelved Alarm icon or the Expand button
. A Shelved Alarm tab will open and show all of the shelved alarms, as well as when the shelved time period expires. To close the Shelved Alarm tab, click either the Shelved Alarm icon or the Expand button ![]() .
.
After the amount of time expires on a shelved alarm, it will be evaluated, and if it is still active, it will automatically return to the Alarm Status list. If the alarm transitions to a cleared state during the time shelved period (i.e., tank water level is low and when the water level returns to the setpoint), the alarm will show up as 'Cleared' in the Alarm Status list instead of 'Active.'
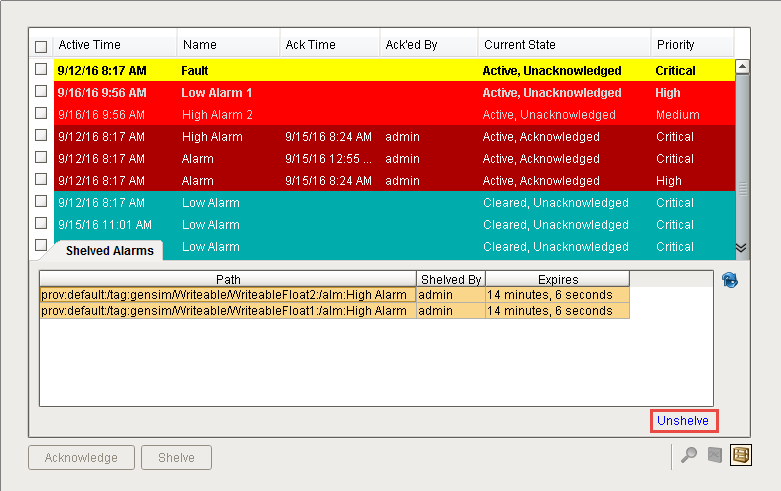
To unshelve an alarm, select the alarm(s) under the Shelved Alarms tab, click the Unshelved link, and the alarm will return back to the Alarm Status list.
Custom Shelving Duration
The shelving duration values on the Alarm Status Table component can be customized. By default, the component has several shelving preset times, but you can add or remove times based on your requirements. One thing to note with modifying the shelving times, is that there is no option to set a shelving time indefinitely. Shelving times are meant to be temporary, not long term.
In the Property Editor, there is a property called Shelving Times. This is where you can add, remove or change the shelving times for alarms.
-
In the Designer, select the Alarm Status Table component, and click on the DatasetViewer icon to open the Dataset Viewer.
-
Click the green plus row icon
 to insert a new row. Enter the hour and the unit of time.
 -
Press OK.
In this example, you can see that 90 minutes was added to the list of shelving times.
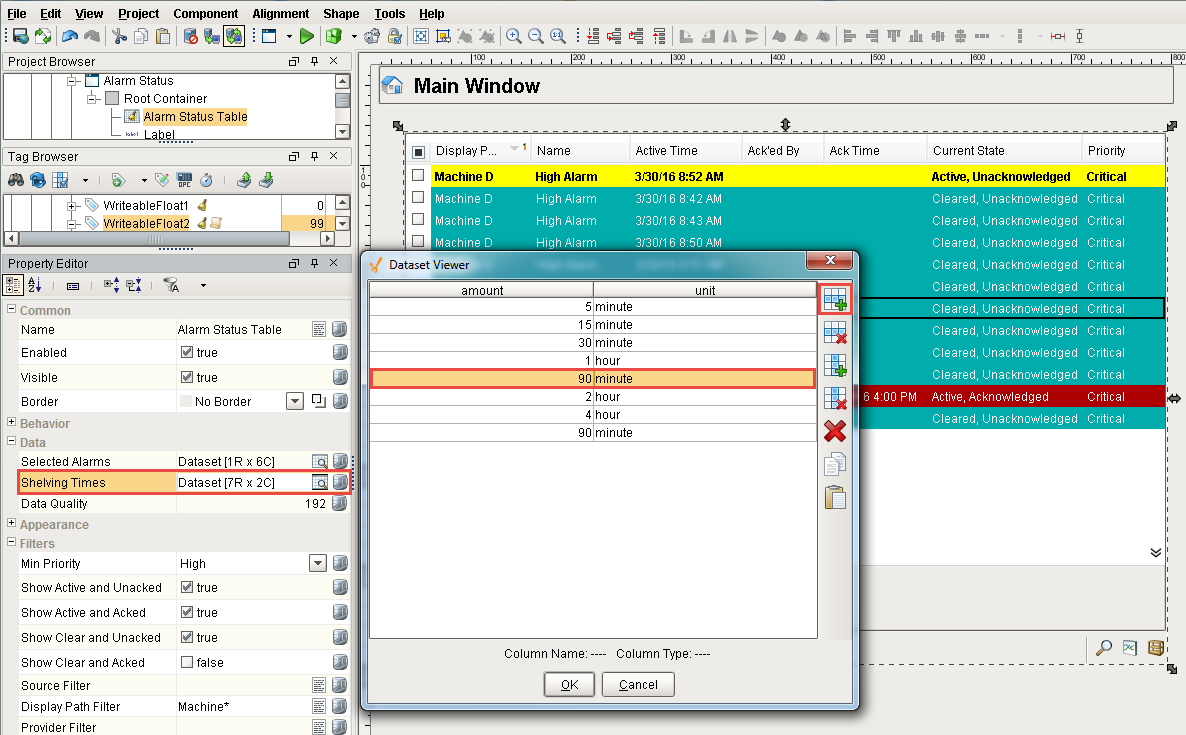
To verify your new time was entered correctly, select the alarm(s) you want to shelve and click the Shelve button. Choose the shelve time from the dropdown list and press Apply to temporarily silence your alarm(s). You can see how easy it is to modify your shelved times.
Similar Topics ...