Using Alarm Status Tags
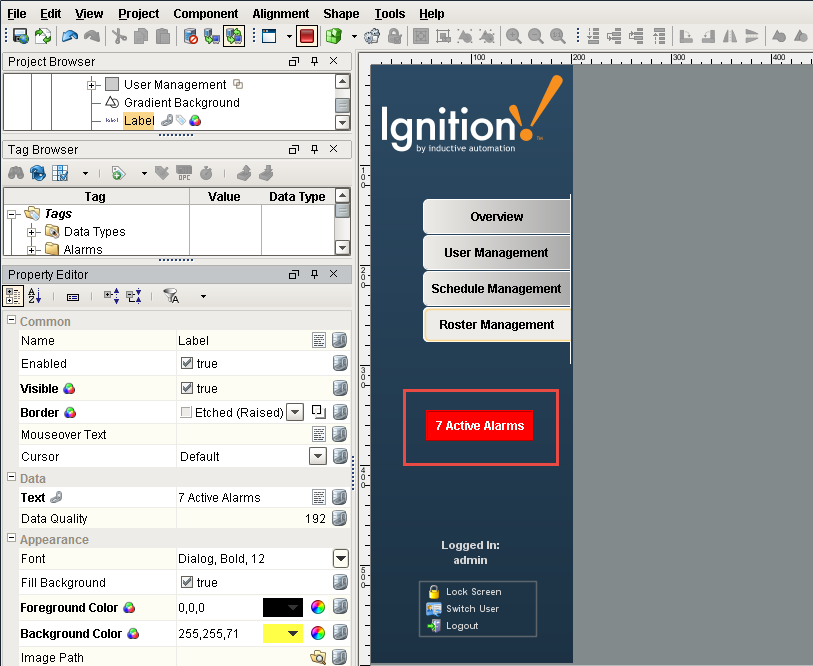
Ignition displays 4 Gateway system Tags that give you the number of alarms that are active and acknowledged, active and unacknowledged, cleared and acknowledged, and cleared and unacknowledged. A quick way to see if any alarms are active and to get a active alarm count is to add a Label component on a navigation window.
Add a Label with Alarm Status
Let's setup an Active Alarm on the Navigation window using a Label component for the Active and UnAcked tag showing how many alarms are currently active and unacknowledged.
-
In Designer, open your Navigation window, drag in a Label component and place it under the tab strip.
-
Link the Label component to the Active and Unacked alarm system tag. Right click on the Label component, and select on Customizers > Custom Properties.
-
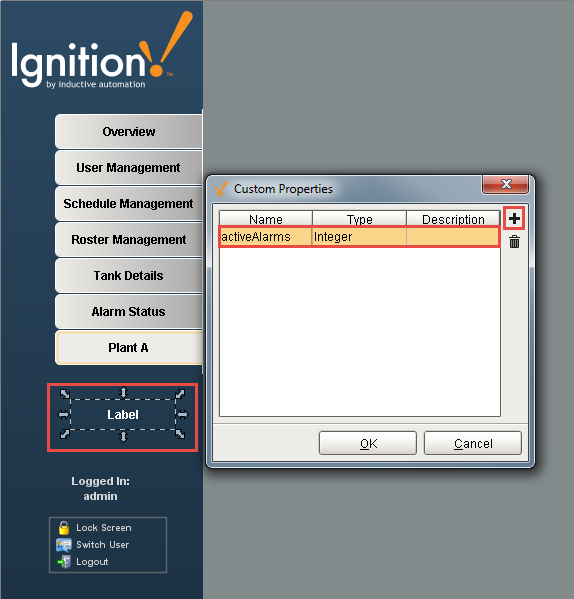
Create a new property and name it 'activeAlarms' with an 'Integer' data type.
-
Click OK.
-
In the Property Editor under Custom Properties, click the binding icon for the 'activeAlarms' property. The property binding window will open.
-
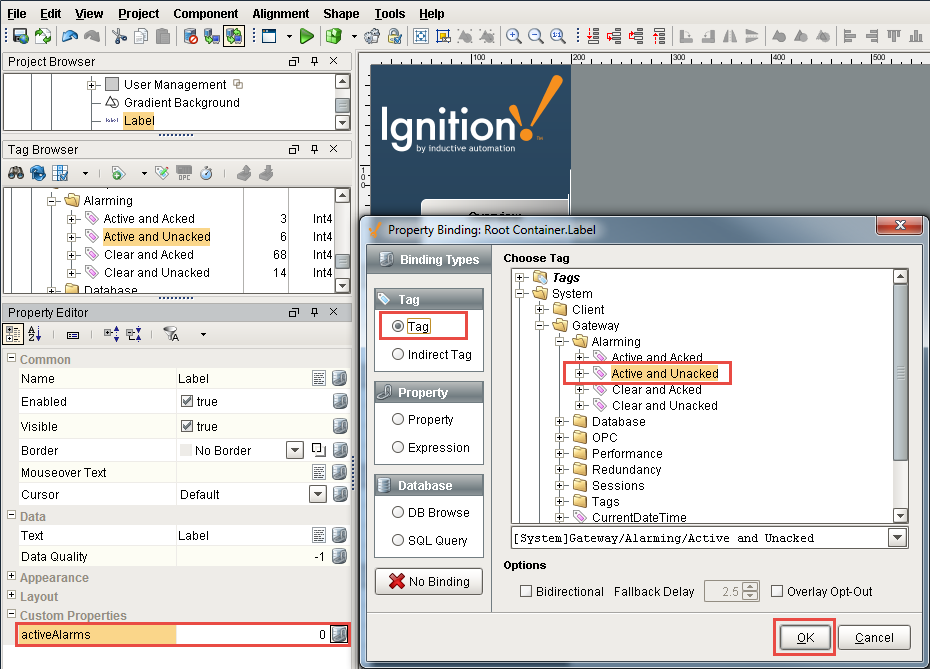
Next, bind the new custom property 'activeAlarms' to the 'Active and Unacked tag.' In the Tag Browser, under Binding Types, select the Tag radio button, and choose the System > Gateway > Alarming > Active and Unacked Tag
-
Click OK.
-
Now we need to display the number of alarms on the Label that are active. Select the Label, and in the Property Editor, click the binding icon
 for the Text property.
Under Binding Types, select the Expression radio button and click the Link icon in the upper right corner of the window.
Bind the Text property of the label and combine the expression with the literal string value 'Active Alarms' as shown below. Click OK twice.Combine Expression with Literal String Value{Root Container.Label.activeAlarms}+" Active Alarms"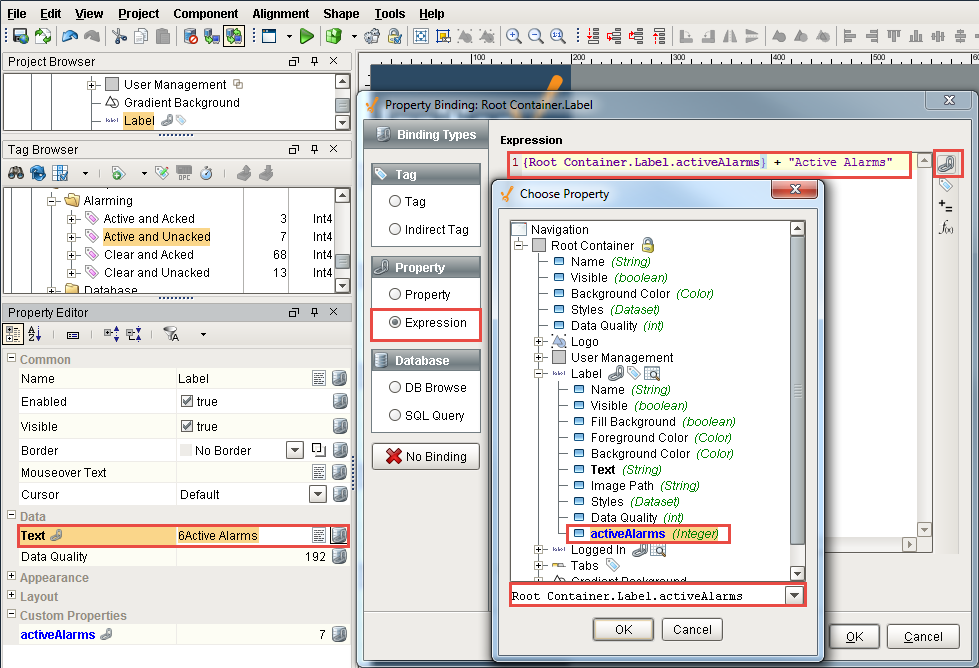
-
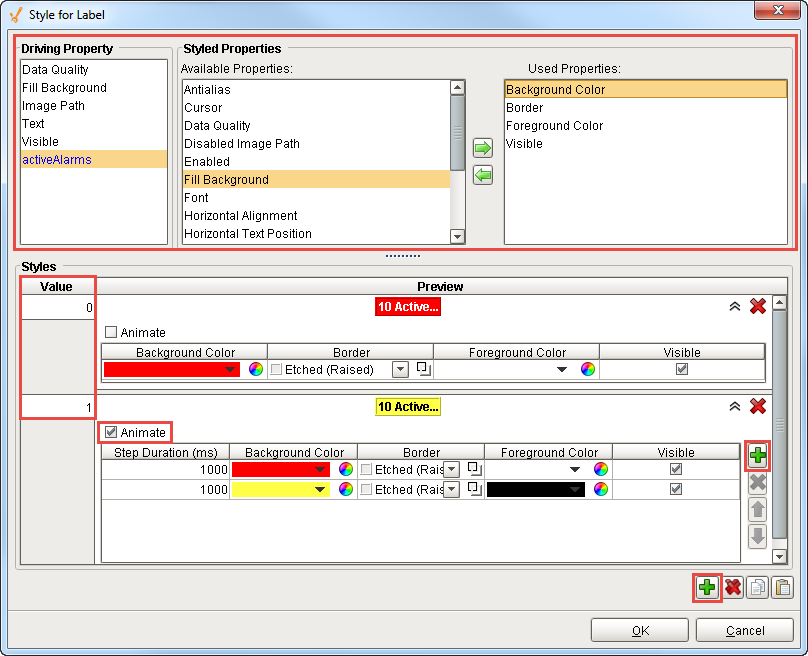
The last thing to do is setup a style to make the Active Alarms label stand out on the Navigation window. Let's change the color to something bright and make it blink. Right click on the Label and select Customizers > Style Customizer.
-
For the Driving Property, select 'activeAlarm,' and for the Styled Properties, select Background Color, Foreground Color, Border and Visible, and click on the green arrow pointing to the right
 and add them to the Used Properties list.
 -
Under the Styles section, click on the green plus icon
 at the bottom 2 times to add 2 Values. Click the Expand buttons
  to open and customize the style for the Active Alarm Label. Set the following values for Styles:
Value 0
Background Color: Red
Border: Etched (Raised)
Foreground Color: White
Visible: check the box
Value 1
Click the Animate box. Use the green plus icon to add 2 animation steps. Change the values to
Step 1 Duration: 1000
Background Color: Red
Border: Etched (Raised)
Foreground Color: White
Visible: check the box
Step 2 Duration: 1000
Background Color: Red
Border: Etched (Raised)
Foreground Color: White
Visible: check the box
Click OK.
. 
Now, you have a label on the Navigation window that blinks when there is an active alarm and provides an active alarm count.