Browsing and Creating OPC Tags
There are two ways to create OPC tags.
-
From OPC Browser
Using the OPC Browser to browse and find the tag and then drag it to the Tag Browser to create the tag. This method is the easiest and most common way to create tags. -
From Tag Editor
When the tag is not available for browsing from the OPC Browser, you create the tag manually, from the Tag Editor window.
Browsing for Tags
The easiest and most common way to create Tags in Ignition is by dragging the tags from the OPC Browser into the Tag Browser window in the Designer.
Now that you are in the Designer, a good first step is to create some Tags. You'll use these tags for realtime status and control and to store history with the Tags Historian. Tags are all configured in the Tag Browser panel.
To create tags by dragging them from OPC
If you have created a device in the earlier step, the easiest way to create some Tags is by dragging the tags from the OPC Browser.
-
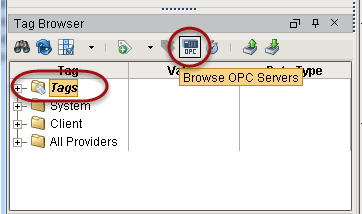
In the Tag Browser, select the Tags folder and click the Browse OPC Servers icon.
The OPC Browser is displayed and you can browse all of your OPC connections.
By default, you've got a connection to the internal Ignition OPC-UA Server, which has the devices in it you created earlier. Browse the devices and find some tags that you're interested in. -
From the OPC Browser, highlight the tags (for example, as in the picture below, both folders inside the SIM folder) and drag them to the Tags folder in the Tag Browser.
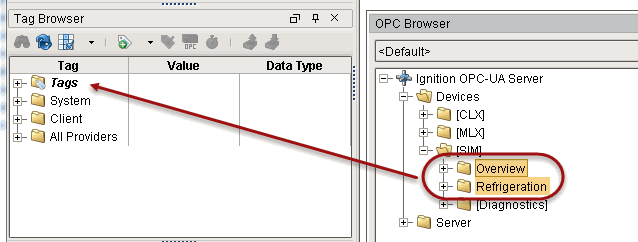
You can drag individual tags or folders. When you drag folders, Ignition keeps the same hierarchy as the PLC. As soon as you drag the tags into Tag Browser, you can see their values being updated in the Tag Browser,
That's it! You now have some Tags. You can see their values come in and start updating automatically. By default, they update at a rate of 1 per second.
To create OPC Tags Manually
You can create OPC Tags manually when you can't find them by using the OPC Browser.
-
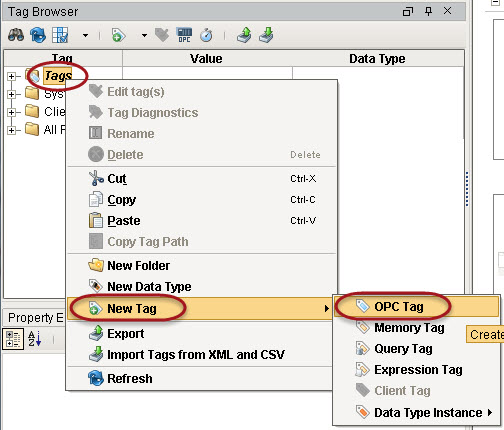
From Tag Browser, right-click on Tags or a folder of your choice and select New Tag > OPC Tag.
-
In the Tag Editor window, as an example, you can set the following values:
Name: Temperature
Data Type: Int4
OPC Server: choose Ignition OPC-UA Server from the dropdown
OPC Item Path: [Modbus]HR1, the Modbus device name goes in the square brackets then you give the address to PLC which in this case is the HR designator plus 1 as the Modbus address. The Modbus Specific Addressing section, explains how your can construct these addresses.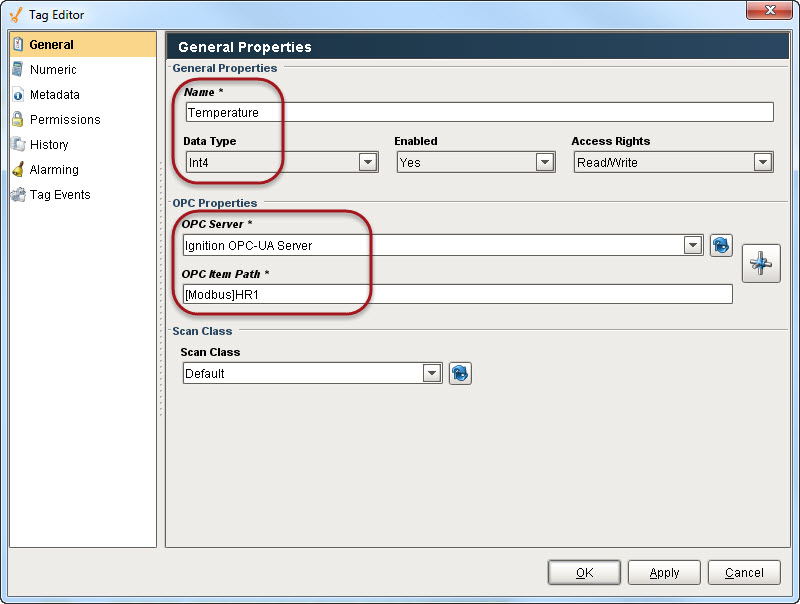
-
Click OK.
Now you can see the Temperature tag in the Tag Browser.
Addressing Bits
In order to address individual bits in Ignition, you must create a separate OPC tag pointing directly to the specific bit in the PLC.
When the integer values that come from the OPC tags are a series of binary bits, it is then possible to address each bit. For example, an integer value can have a 16-bit binary representation as shown here:
Integer |
Bit level representation |
How it works |
|
4096 |
0,0,0,0,0,0,0,0,0,0,0,1,0,0,0,0 |
212 = 4096 |
|
1025 |
1,0,0,0,0,0,0,0,0,0,1,0,0,0,0,0 |
20 + 210 = 1025 |
To address an individual bit
Suppose a MicroLogix PLC is connected to a Gateway.
-
From the Tag Editor window, create an OPC tag to have:
Data Type: Integer with a value of 1025
OPC Item Path: [MLX]B3:0 -
Then create a new OPC tag with a Boolean value to the first bit of this tag as follows:
Data Type: Boolean with a value of 1 or True
OPC Item Path: [MLX]B3:0/0 (for Micrologic, you can specify the bit as: 0/0 or 0.0. That is, with a slash/ or a period.) [MLX]B3:0/0 has a value of 1 or a Boolean value of True