UDT Composition
A UDT can be nested inside of a different UDT.
In this example, a Motor data type and Tank data type were already created. We want to create a third UDT called Area. The Area UDT will contain the Motor and Tank
data types inside of it.
-
In the Tag Browser, right click on the Data Types folder and select New Data Type.
In the Name box, enter Area. -
In the Tag Editor, add 2 data type instances, one for Motor and the other for Tank.
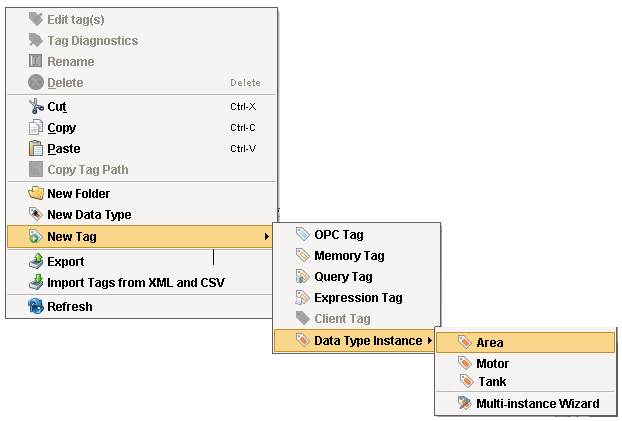
Click on the green + icon, select Data Type Instance > New Motor.
Click on the green + icon, select Data Type Instance > New Tank.
Rename both new data types to Motor and Tank respectively.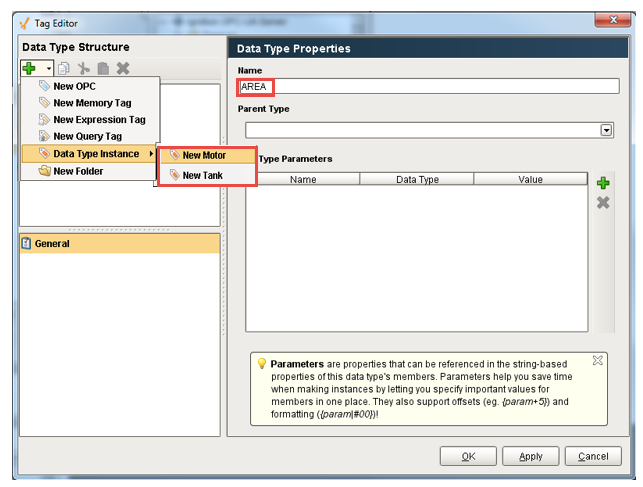
-
Every UDT you add inside another UDT has paramters that need to be specified and passed in from the parent UDT. Motor has 2 parameters: DeviceName and MotorNumber. Tank has 2 parameters: DeviceName and TankNumber.
-
If both data types use the same parameter as in this example with the DeviceName parameter, you only need to enter it once in the new UDT.
In the Tag Editor, click Area and enter the parameter from the Motor and Tank data types: DeviceName, MotorNumber and TankNumber.
Click OK.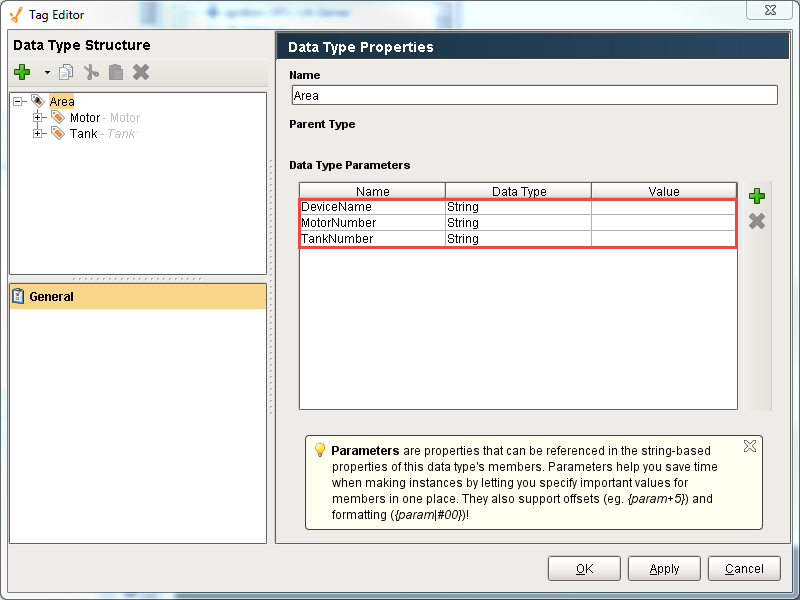
-
The values in the Area UDT need to pass to the Motor and Tank data types so references need to be added.
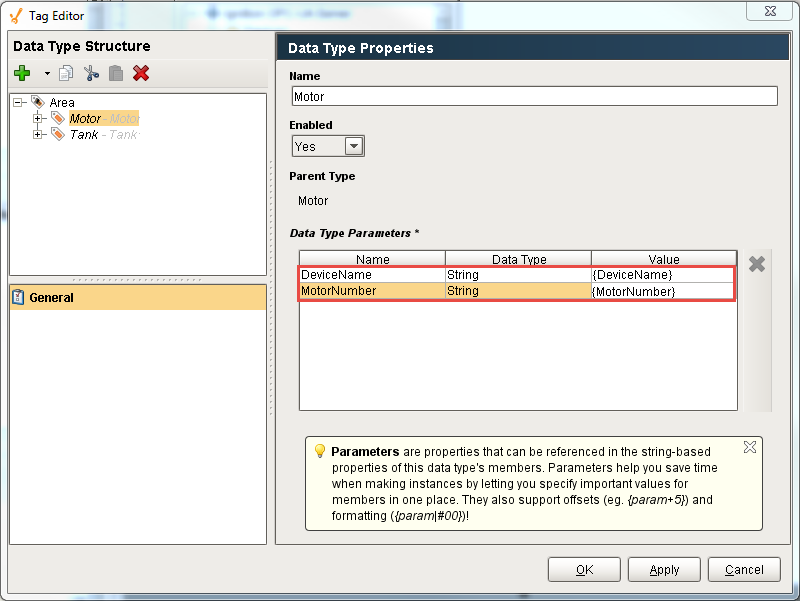
In the Tag Editor, click on Motor and enter the references.
For the parameter DeviceName, enter the value {DeviceName}.
For the parameter MotorNumber, enter the value {MotorNumber}.
Click OK.
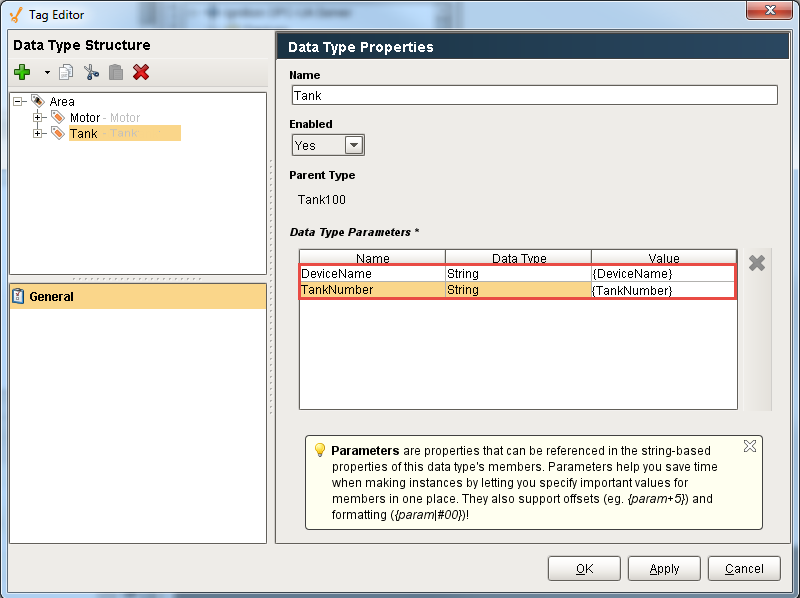
In the Tag Editior, click on Tank and enter the references:
For the DeviceName enter the value {DeviceName}.
For the parameter TankNumber enter the value {TankNumber}.
Click OK.
-
Now, create a new instance of Area. In the Tag Browser, right click on the Tags folder, select New Tag > New Data Type Instance > Area.
In the Name box, enter the new instance name, Area 1. Enter the values for each parameter:
DeviceName, enter CLX.
MotorNumber, enter 1.
TankNumber, enter 100.
Click OK.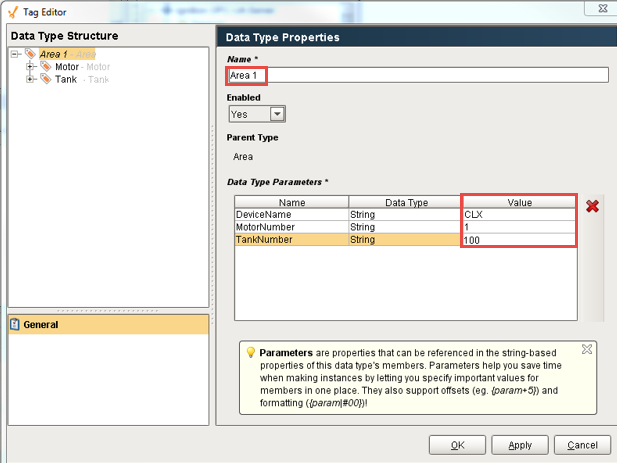
-
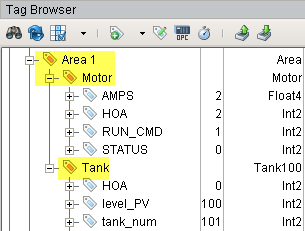
From the Tag Browser, you can see Area 1 was created. Expand Motor and Tank data types to validate the values are pointing to the appropriate places in the PLC.
-
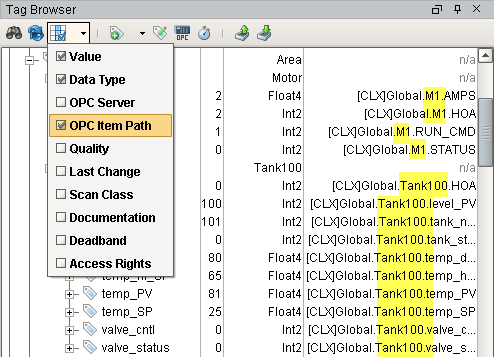
You can also verify the path in the Tag Tree that Motor is pointing to M1 and Tank is pointing to Tank 100.
From the Tag Browser, click Area 1 and check the OPC Item Path from the dropdown. .