Publish Selected Resources
It's possible to publish individual resources on a project as they are finished instead of publishing the entire project. This is helpful if you want to get resource updates to users or into production quicker rather than waiting for the entire project to be published.
-
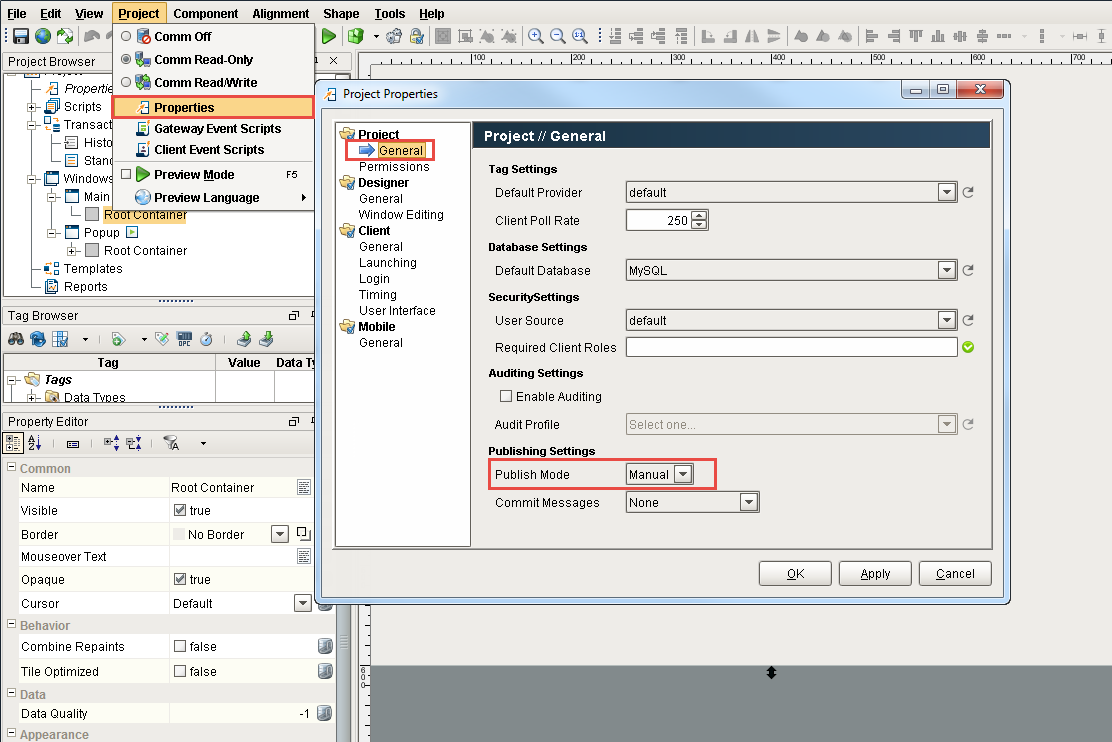
It’s important to note that the Publish Selected option is only available in the Publish Mode when set to Manual. If it is set to Auto, you will not be able to publish your project resources individually. To check, go to Project > Properties. Under Project> General, set the Publish Mode to Manual, and press OK.
-
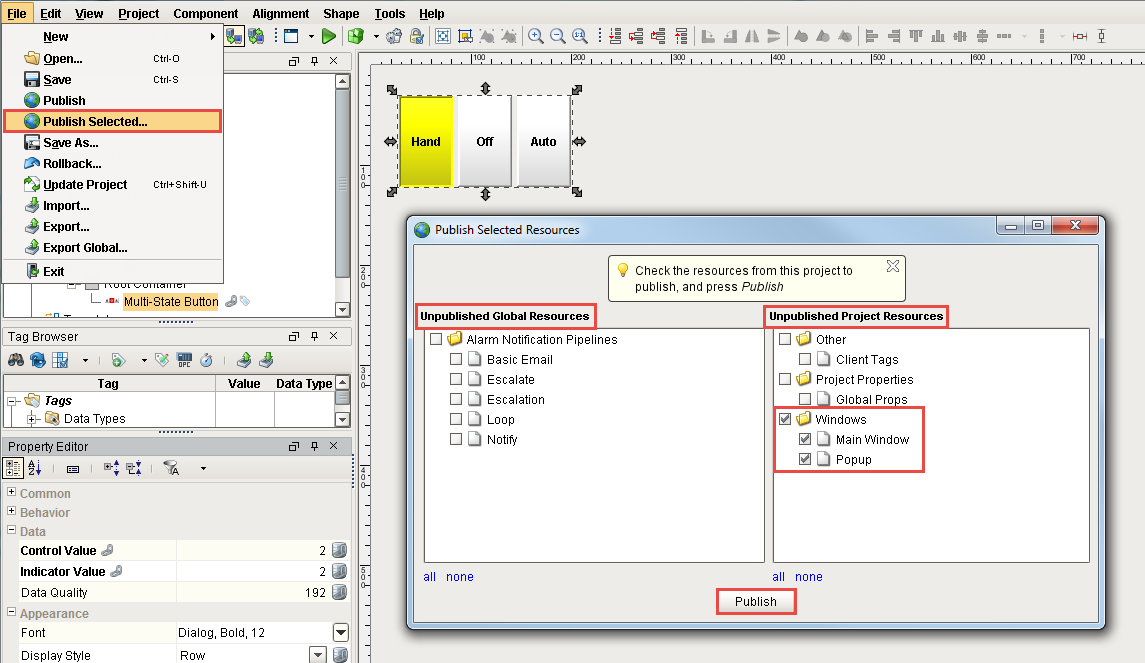
Go to your Designer and open a window. To publish selected resources, go to File > Published Selected. Here you can specify which Global and Project resources you would like to publish. Select the resources to publish, and press Publish.
-
In this example, you will notice that the Historical Group was created as a new resource in the project, but is grayed out. This is because the project was not saved. You can only publish items that were saved in your project. So keep in mind, when you see that an item is grayed out, go back and save your project. Then you can select your item and publish it.

As you can see, using the Publish Selected option gives you another way of publishing your project resource updates, and can even get them to your users more rapidly.
Similar Topics ...