Simple Pipeline
The most basic Alarm Notification Pipeline will simply notify users as soon as the alarm becomes active.
Configure Alarm Notification Profile and On-Call Roster
Before you create a pipeline in the Designer, you need to configure at least one Alarm Notification Profile and at least one On-Call Roster in the Gateway.
The following example will create a simple alarm notification pipeline in Ignition.
-
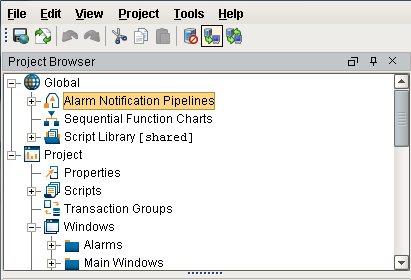
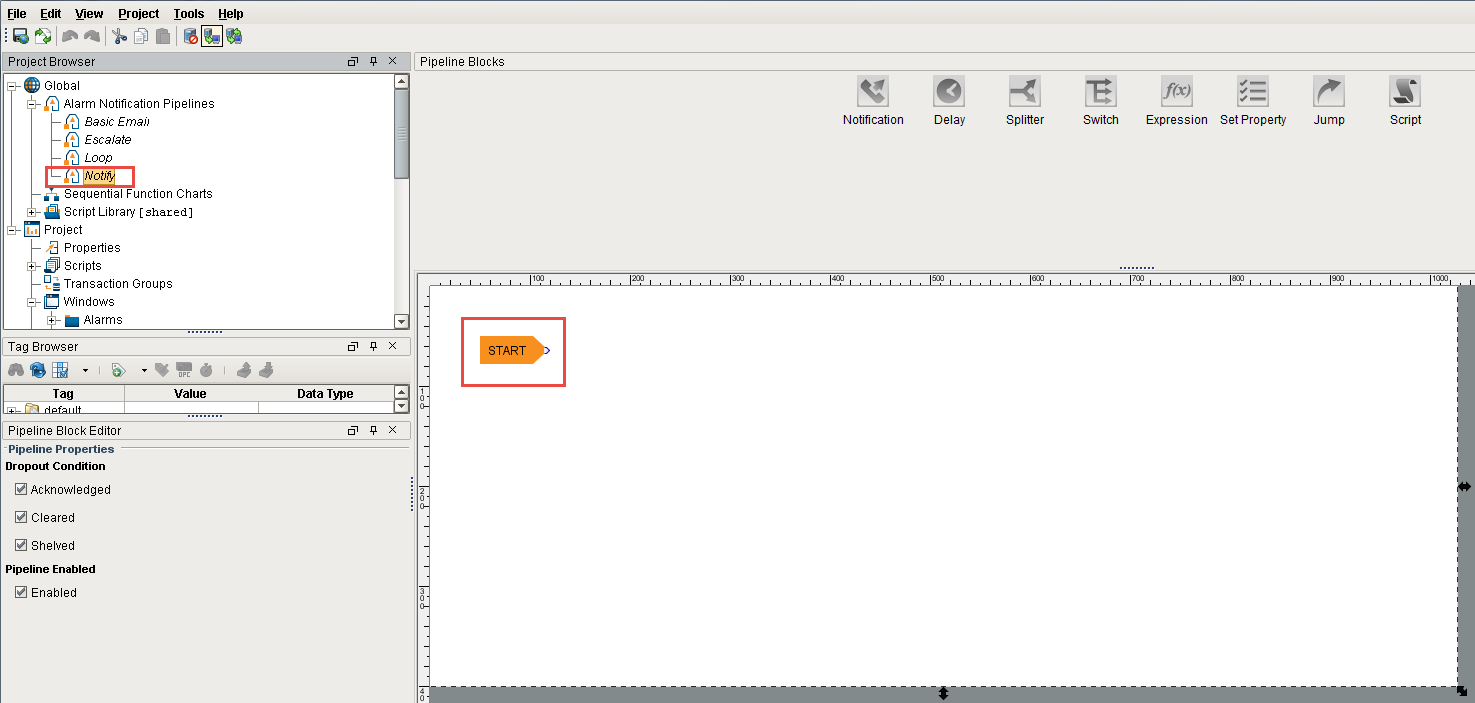
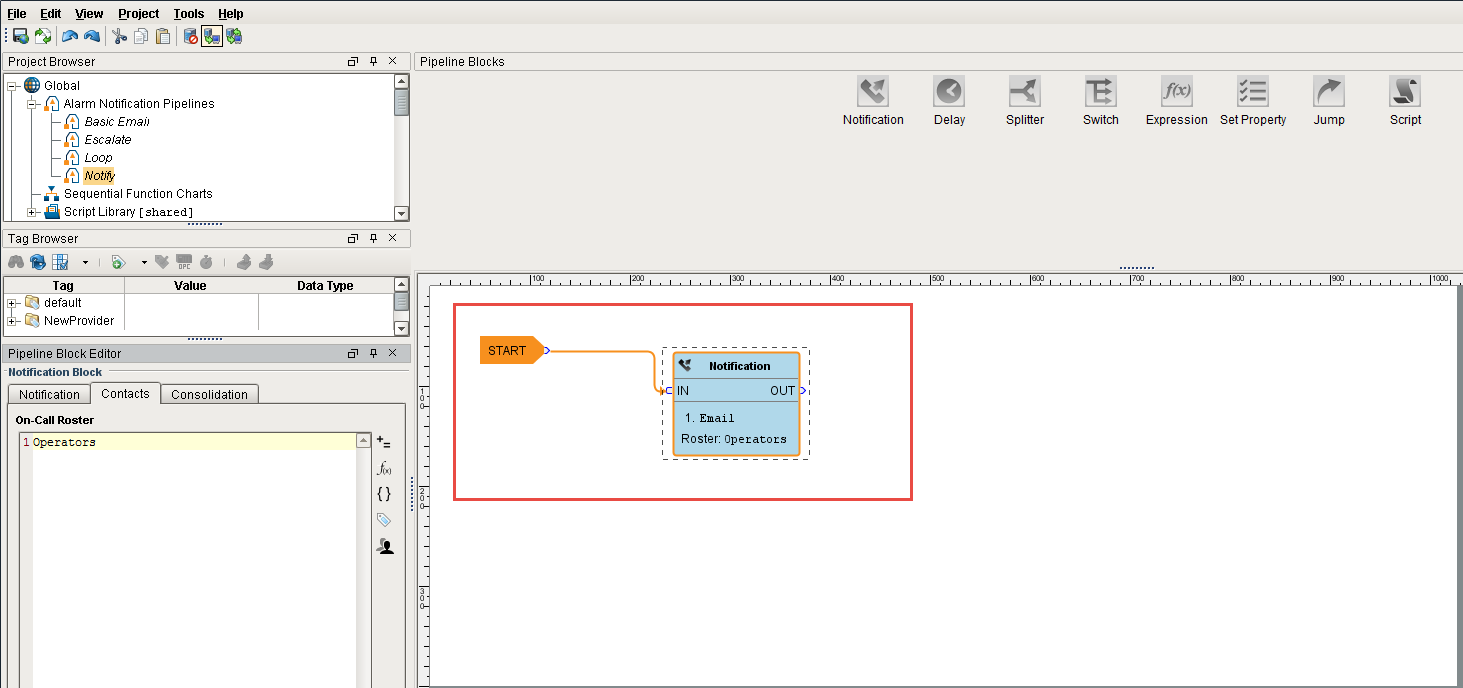
In the Designer, create a new pipeline in the Project Browser by going to the Global > Alarm Notification Pipelines area.
-
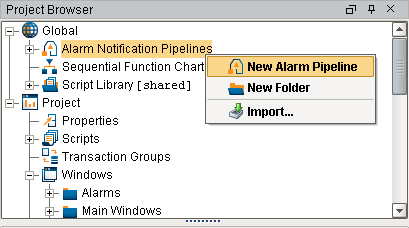
Select Alarm Notification Pipelines under the Global area, and right click to create a New Alarm Pipeline.
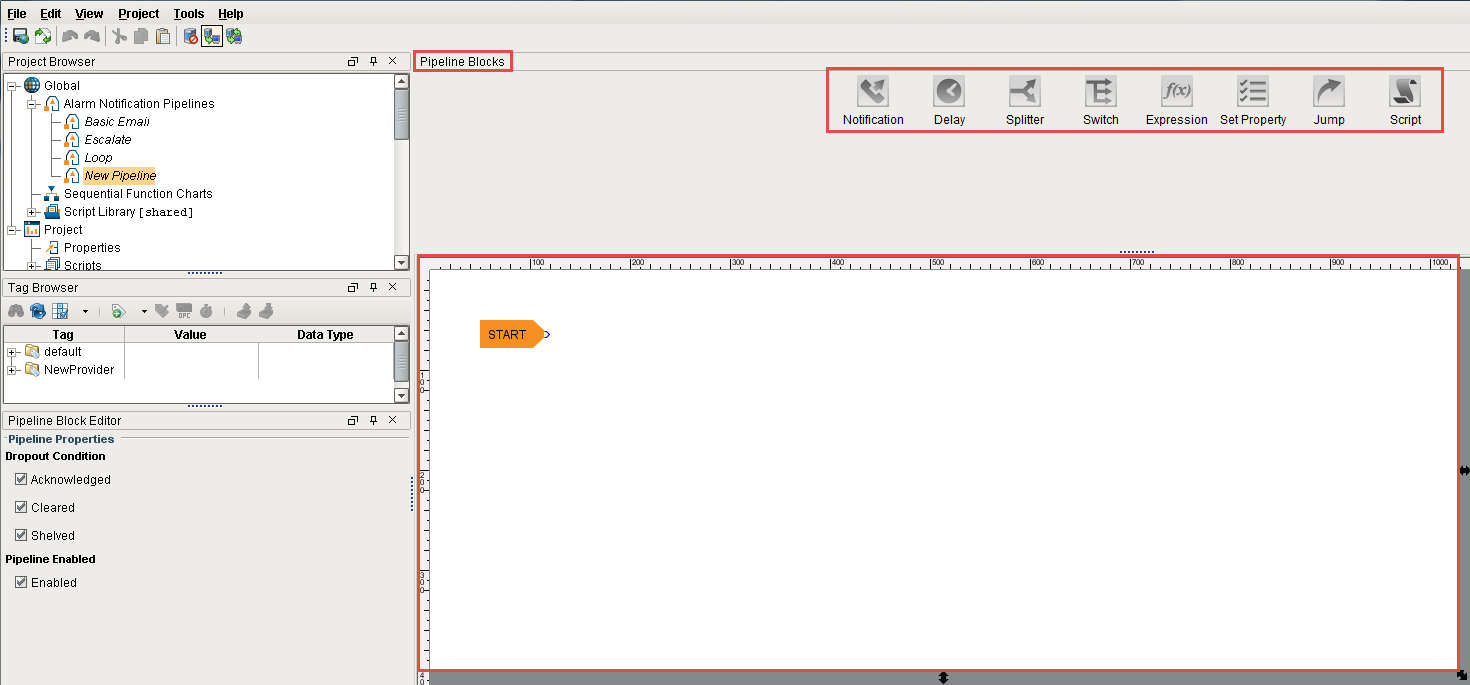
When you create a new pipeline, the Designer switches to the Pipeline Workspace. The workspace is essentially a blank canvas and can contains various Pipeline Blocks. By default, the name of the new pipeline is called ‘New Pipeline.’
-
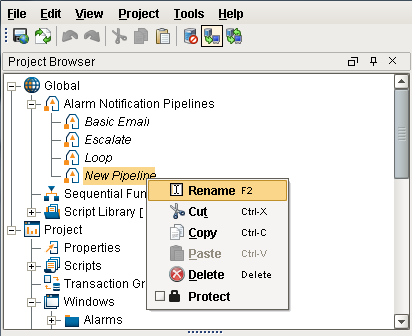
It is a good practice to give a meaningful name to the pipeline. Commonly, the name acts as a way to describe what the pipeline does. Select your ‘New Pipeline,’ right click and Rename it to ‘Notify.’
Every pipeline has a Start Block which you will see when you create your pipeline. When an alarm occurs, it’s going to come to the Start Block and from there you can use other blocks to determine what you want to do with that alarm.
-
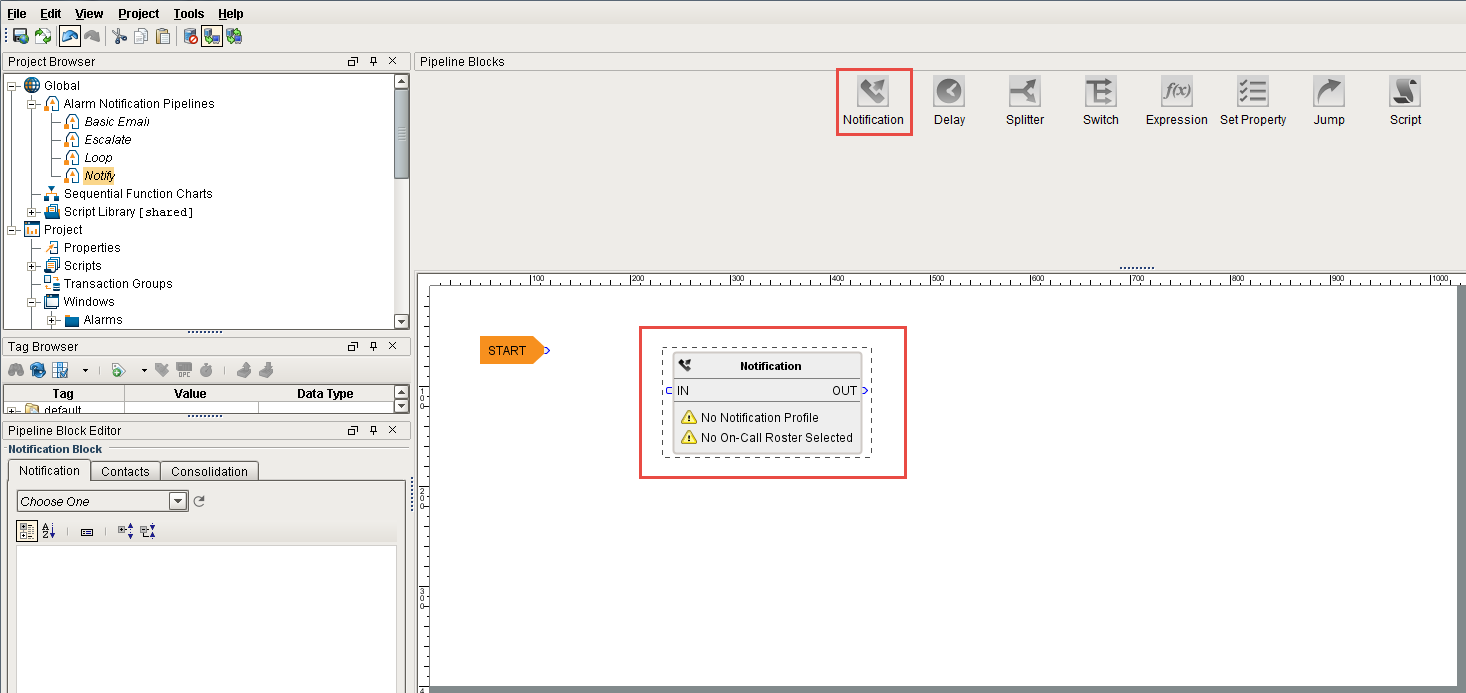
The most basic pipeline you can create is to simply notify someone right away when an alarm occurs. You will notice that there is a Notification Block above the canvas. Drag the Notification Block on to your canvas and place it next to the Start Block. Once you drag it in to your pipeline, it is not connected yet.
-
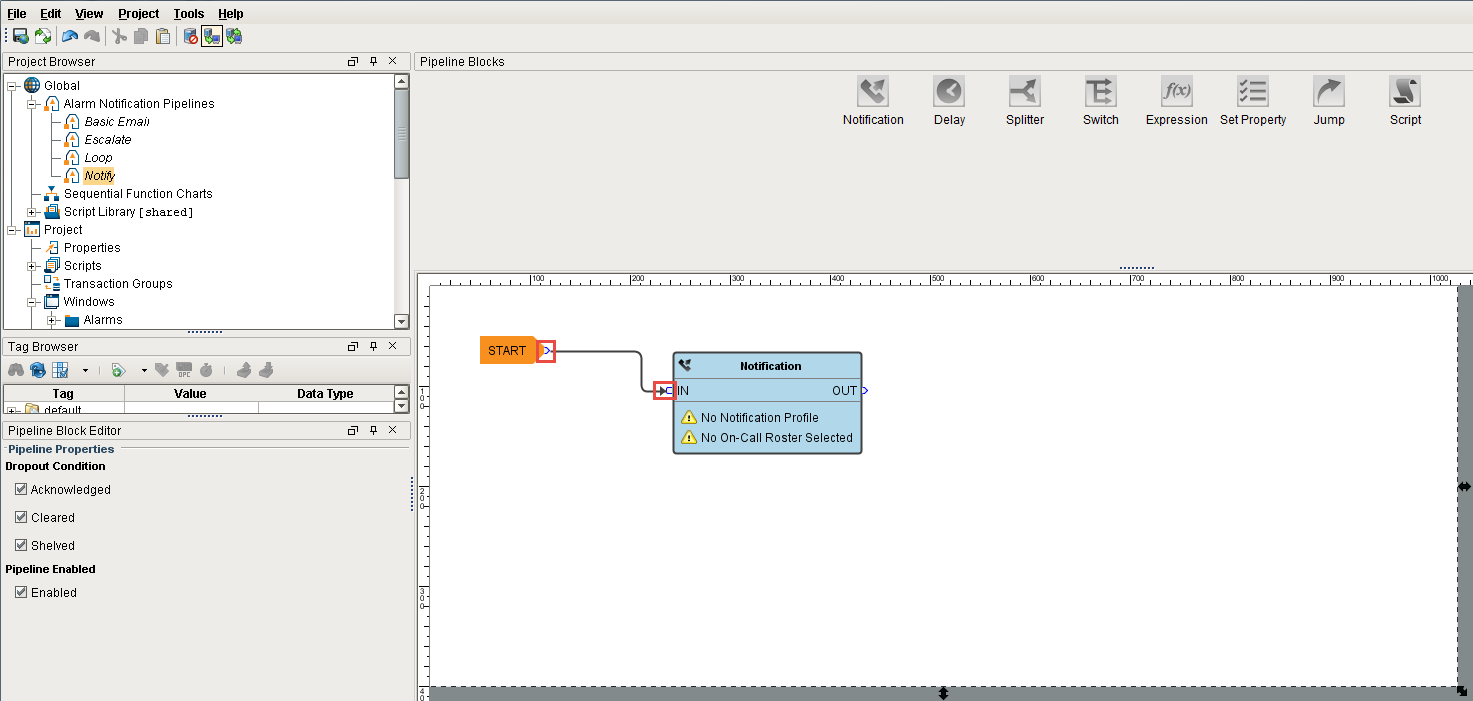
Next, drag the output pin from the Start Block to the input pin of the Notification Block. So now the 2 blocks are connected, and when an alarm occurs, it’s going directly into the Start Block and then into the Notification Block.
-
On the Notification Block, you have to configure the Alarm Notification Profile that you are going use and who you are going to send it too. You should have already configured your Alarm Notification Profile before creating your new pipeline.
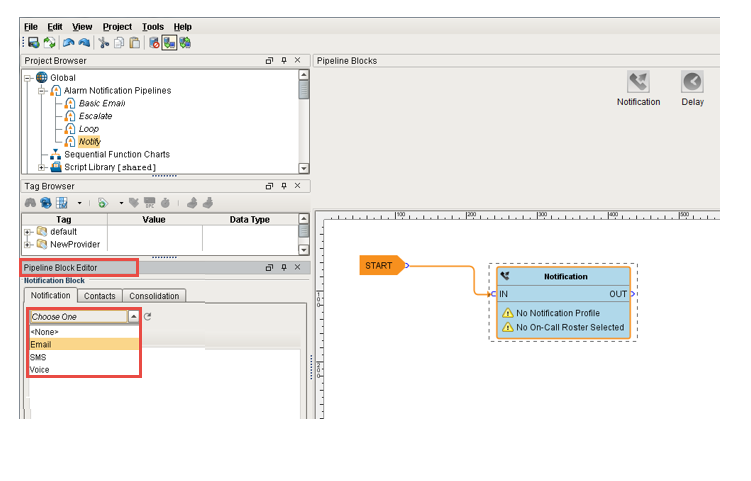
Click on the Notification Block, and under the Pipeline Block Editor choose which Notification Profile you want to use: Email, SMS or Voice. You can see that all 3 profiles are configured, but for this example, choose Email.
-
Under Contacts, in the Pipeline Block Editor, click the On-Call Roster icon on the right side. Select from users and groups who you want to send this alarm too. Your On-Call Roster should have already been created before creating your pipeline.

You just created a very simple Alarm Pipeline. When this alarm becomes active, it goes directly to the Start Block and notifies all the operators via Email one time.
Pipelines don’t do anything until an alarm is told to use it. Once you configure your Alarm Notification Pipeline, the next step is to tell your alarm to use your ‘Notify’ pipeline when the alarm becomes Active, Cleared or ACKnowledged. How to make your alarm use a pipeline is covered in the next section.