Working with Vision Windows
Working with windows is easy. Windows are the top-level design units for Vision projects and come in different types such as Main, Popup, and Docked windows. All you need to do is select a window from the window types, drag some tags to your window, and select the components you want to use. If you prefer, you can even drag individual components to a window, and then select your tags. You can organize your window into folders, rename them, add notes about your windows for others to see, import and export windows, and add security on your windows.
Windows are where your projects get their start.
Window Types
Ignition provides three window types and each behaves a little differently.
-
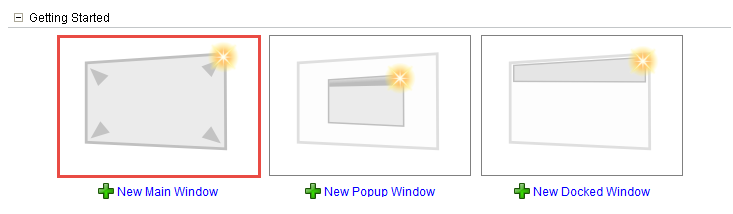
Main window - acts like a typical HMI screen taking up all available space.
-
Popup window - are often opened by components in a main window and appear on top of a main window.
-
Docked window - sticks to one side of the screen and nothing can overlap it.
These three windows types are described in detail in Window Types.
To create a Window
Creating windows is as easy. There are three ways to create a new window and each way is shown below.
-
When you open your project, the three window types are displayed. Click on the New Main Window. or any window type you want to create.
-
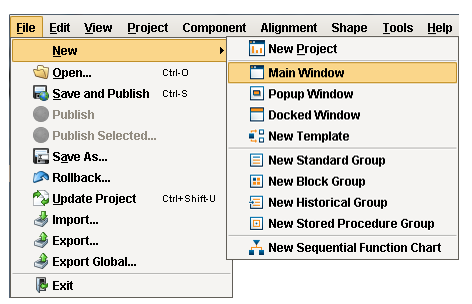
Go to your menubar at the top of the Designer and select File > New > Main Window or any other of the window types you want to create.
-
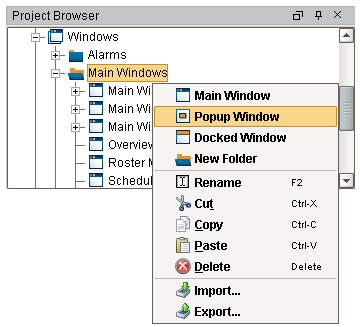
In the Project Browser, click Main Windows and select any of the window types. This example creates a Popup Window.
That's it! You now have a new window. To see it in action, all you have to do is add components, drawing tools, and tags to your window. Once your components and tags are added, save and publish your project to checkout what you've added to your window.
Organizing Windows
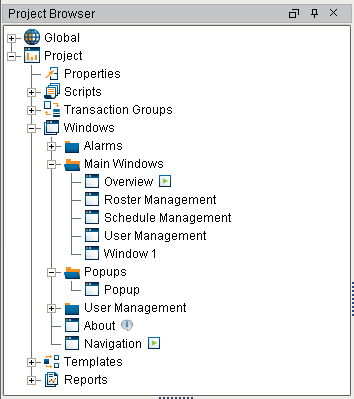
You can also create folders to organize your windows. A window's name must be unique among the windows in its folder, but you can have the same window name in multiple folders. A window's name and folder path is very important - it will be how other windows reference it. You can create as many folders as you want, and nest them as deep as you need for your project. The built-in Project Templates use this structure:
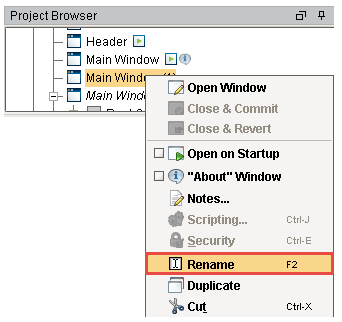
Naming and Renaming a Window
In the Project Browser, right-click on the window and choose Rename or press F2. Enter a new name for the window and press <CR>. The name must be unique in its folder, but using something descriptive is always recommended.
Special Window Properties
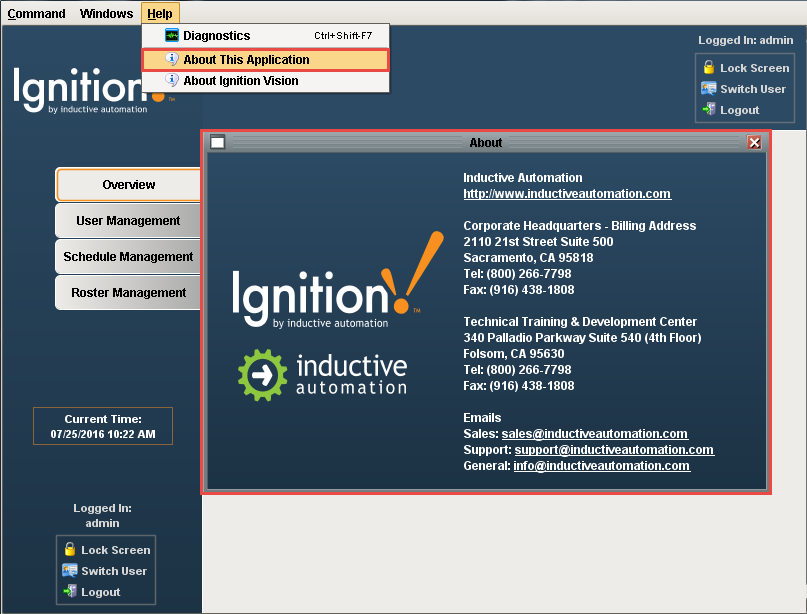
About Window
In the Project Browser, right-click on the window, and select the check box next to "About" Window. Once checked, the window will be accessible from the Help > About This Application menu in the Client, which opens the appropriate window.
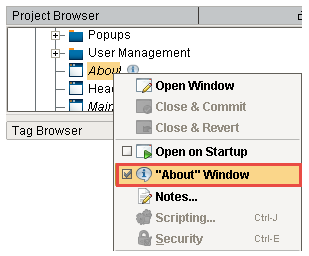
In this Project Template example, the About Window provides some contact information for Inductive Automation.
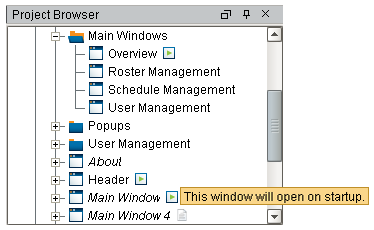
Open on Startup
Be default, most projects open a static set of windows automatically when the client is opened. You can select which windows to open on startup by going to the Designer, right click on a window, and choose Open on Startup .
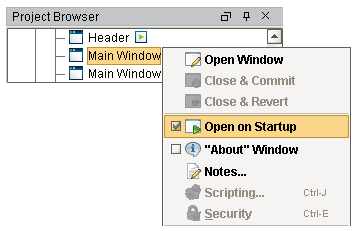
All windows that Open on Startup have a little box with a green right arrow next to the window name.
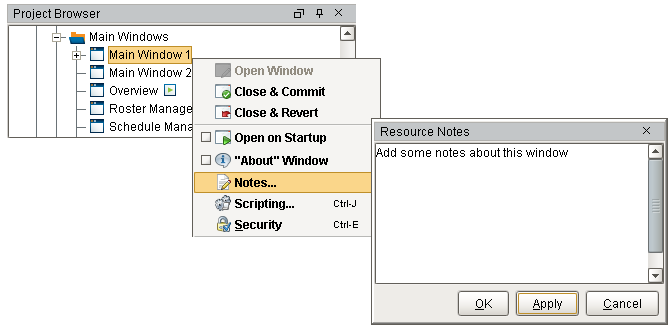
Adding Notes on Windows
Through the right-click menu on a window in the Project Browser, you can access the window's Notes. This free-form text field is provided to let you document the purpose of the window and/or any technical information about how the window works.
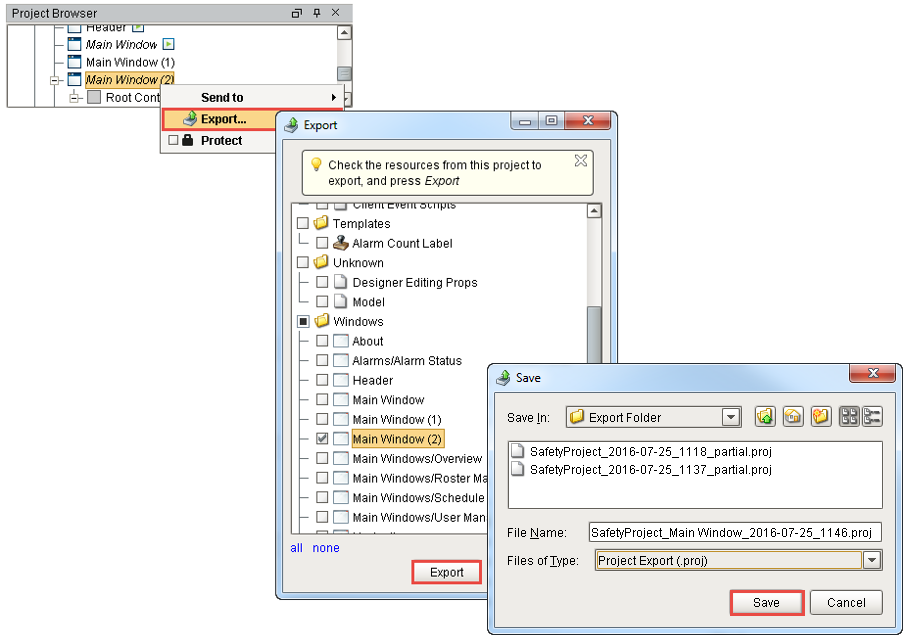
Exporting and Importing Windows
In the Designer, you can export and import windows from one project to another project using external files. You can even use the Export function to do a backup of your window(s) and load it later.
Exporting a Window
-
In the Project Browser, select a window folder, right click, and select Export. The Export wizard will open.
-
Check the windows and the resources that you would like to export.
-
Click Export and choose a folder path for your backup file. Ignition will provide a default filename with the file extension ".proj."
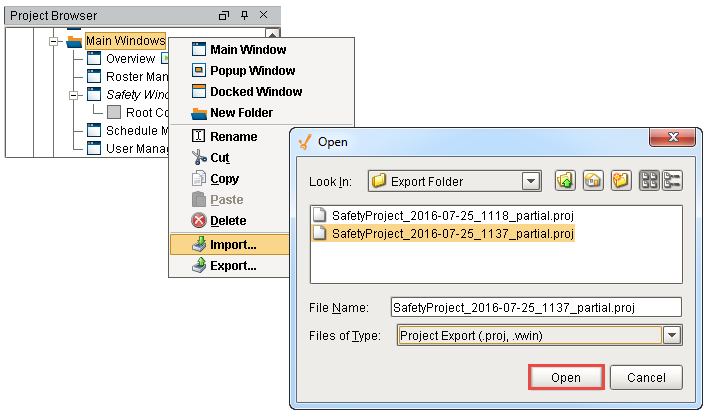
Importing a Window
Importing windows is just as easy. You can replace or restore a window using the exported *.proj file. If you are importing a window to another project and the window doesn't already exist, Ignition will create the folder path and window for you using the full path in the *.proj file.
-
In the Project Browser, select the folder location where you want to add your window. Right click and select Import.
-
Select the *.proj file from the folder location where you saved your export, and press Open. Ignition will create the folder path and window if it doesn't exist, or replace the existing window. That's it!
Default export / import file type ".proj, .vwin"
In previous versions of Ignition, the export file type for windows was .vwin instead of .proj. Because Ignition is backwards compatible, it will accept both the current .proj and older .vwin file types when importing.
In This Section ...