Navigation - Drill Down
Another popular navigation strategy in Ignition is to drill down into various areas of your project using a map. The Drill Down navigation strategy is ideal if you have different geographical locations. A good example is to have a main window that has an image like a map or a background image representing a plant. The image has various components such as boxes, circles, etc., that overlay the image. When the user selects one of the overlay components, the Client swaps windows with a window that displays information that pertains to the selected area of the map or plant.
It is a very simple navigation strategy to setup and is popular because it lets people orient themselves on where they are located in the factory, and they can drill down into all these different sections very easily from one place.
To create a navigation drill down in Designer
-
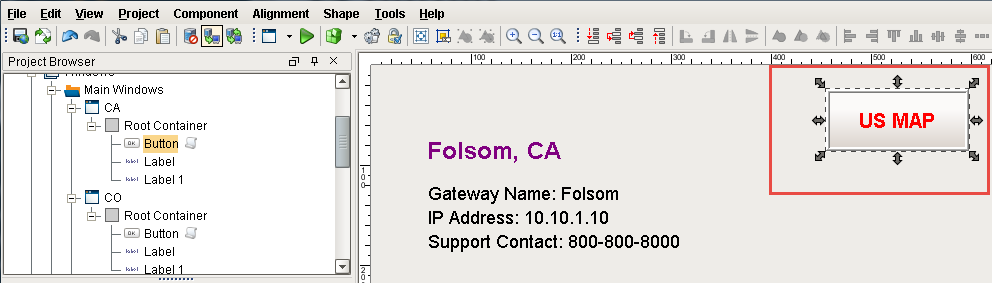
Drag an image on to a Main Window. (This example uses a US Map).
-
Create a component such as a box, circle, star, etc., over an area on your image.
-
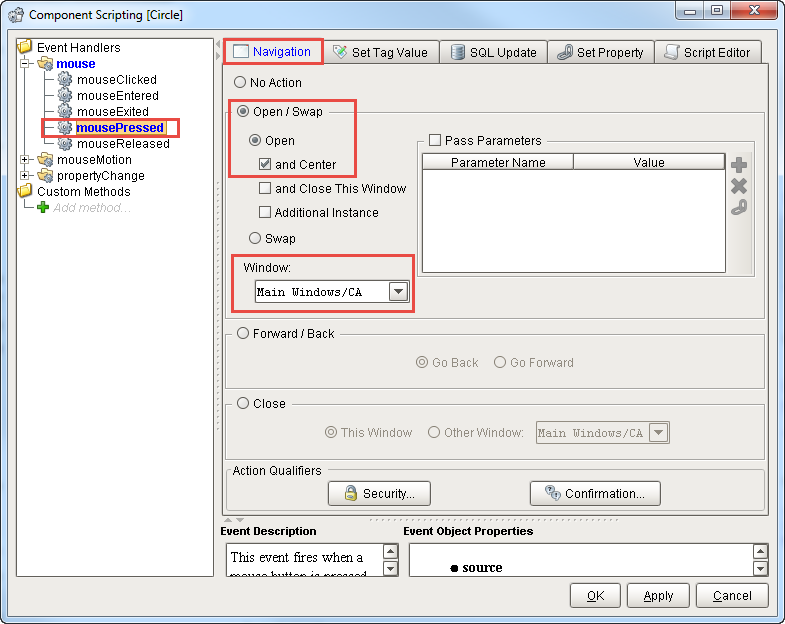
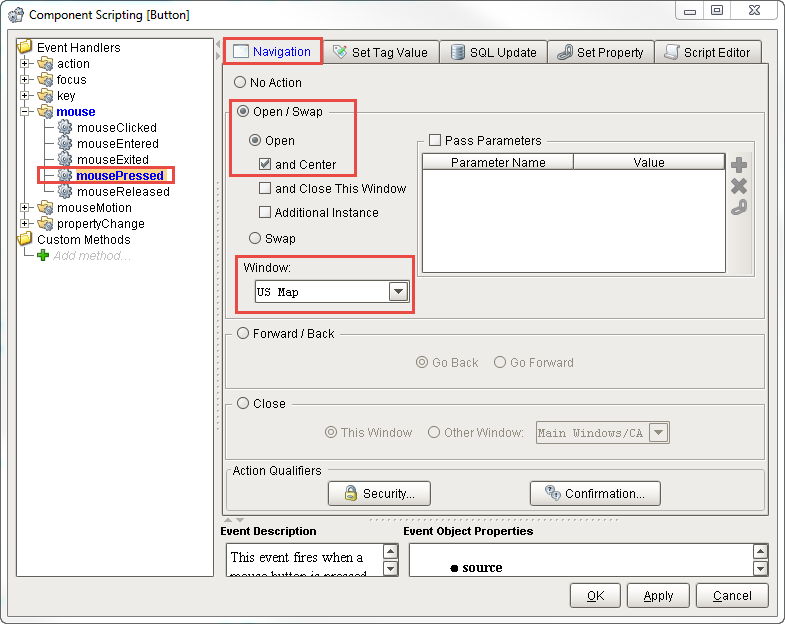
Right click the component (box, circle, etc.,) and select Scripting.
-
Select the mousePressed event handler, and with the Navigation tab selected
-
Select the Open/Swap radio button.
-
From the Window drop-down box, select the window that relates to the selected area.
-
Click OK.
-
-
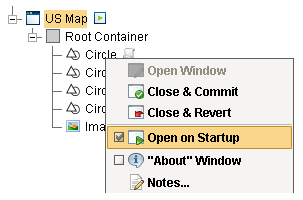
Select your US Map window and set it to Open on Startup.
Area windows already created
This example assumes you already have your area windows created in your Project Browser.
-
On your area window, add a Button component to navigate you back to the main window. (If you have multiple area windows, copy and paste this button to each window).
-
Open your area window.
-
Add a Button component.
-
Right click on the Button component and select Scripting.
-
-
Select the mousePressed event handler, and with the Navigation tab selected
-
Select the Open/Swap radio button.
-
From the Window drop-down box, select the window that is your overview map.
-
Click OK.
-
-
To test your window navigation in the Designer, use the Preview Mode to switch between windows.
-
Save and Publish your project.
-
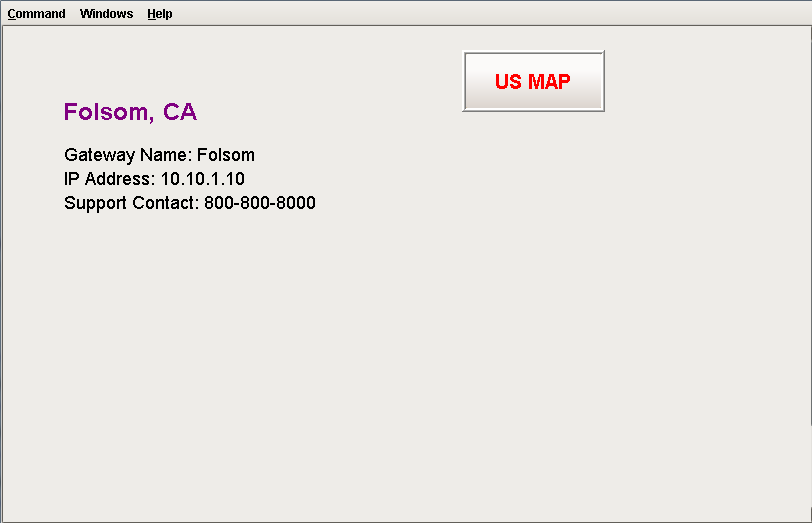
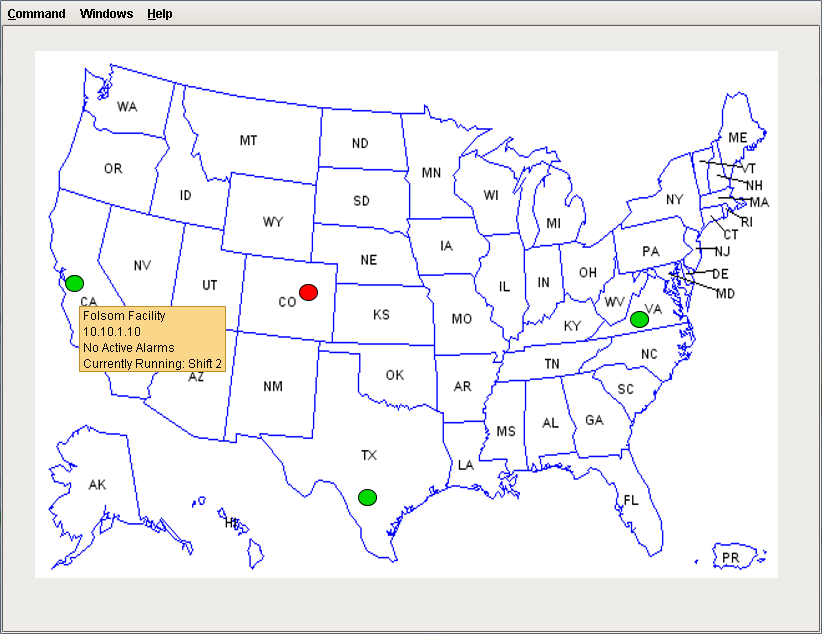
Now, try it out! Open your Client, and click on your special shape to navigate to the area selected. You'll notice that in the following example the Mouseover Text property was used to display the location information when you hover over one of the circles.
Drill Down Navigation with Mouseover Text
10. Click on the US Map button to take you back to the US Map.
Area Window with US Map Back Button